• Welcome to For Trucks Only !

    We are a community of American Brand Pickup Truck and SUV owners. Join now! Its Free!

My Father & Son Dodge Truck build.

67 Power Wagon

Well-Known Member
Joined
Oct 5, 2015
Messages
743
Reaction score
384
Location
Hell,NH
Guys,
So all know, in this first posting, I have been working on this slow build for over a year and a half! (I'm building this set of trucks after 2 trucks that my Dad & Owed at about the same time..... Within months of each other. HOWEVER there is a catch, to the story, Dad & I went through a MASSIVE fall-out, that lasted for 20 years! Sadly, due to my own Mother, 6 years ago however, I held out an oilve-branch and Dad took it, to both of our happiness, as well as my family and his (him seeing his ONLY Grand-child for the first time her life and him in his...)

ANYWAY, these 2 trucks were owned at the same time his by him mine by me, in that 20 year span of time, and this build puts the 2 of use as Father & Son together.....

I lost Dad, going on 3 years ago as of April.... R.I.P Dad....

SO then, the following post will be the start of this build! ENJOY!
 
Back when I was a teenager, I worked for a garage that you all by now should know! This same garage at that time, was trying to help me get a "first" car or even truck and I worked for it, the owner found me a '78 Dodge Power Wagon, W-100. I was all for it, and he simply wanted me to work for the cost of the truck for 2 weeks and the truck was mine to work on after hours, and so, I took his offer as it was thee only way I was gonna have a 16th birthday vehicle.
The truck was 4x4, it had a Mopar 360 in it. and was pretty solid body and frame! BUT upon checking the engine, it turns out that 360 was seriously "pounded" a lot of little things point that it was ran and used, with little to NO oil in the engine! ;-|
So, the owner, Don told me, we'll yank it, and see what I can find. I was agreeing to this as that 360 was never gonna last long knowing it had been used with little to no oil in it. The engine itself, needed both heads replaced, and had a soft wrist pin in the rotating kit, and I simply wasn't going to do all I wanted to do to it, and then risk the engine blowing for sure. So, about 2 more weeks AFTER this, the owner, Don, found a '69 Plymouth 440 "Super Commando" engine. Basically a 440, with a 4 barrel carburetor. Told me he can get it for me, if I agee'd to work yet another week, for the cost of the engine. SO, I got it. I at this point already owned the truck my 2 weeks of working for free were up! SO, it was in to this that far and Don, always treated me good kid or not.....
Was a bit of work to get that engine into the truck, but we did it, I only ever got to "test" drive it, as I could run 2 miles up the road, and back from meing an employee to the garage on the very out skirts of my home town, 4 houses away from where I grew up in Pennsylvania.
So, this model, is going to be built, as my truck would have been when it was done, and I had my drivers license!!!!! Not a lot of "building" just Mopar stuff Don had given to me over the time this truck was being built, road worthy, however you want to look at it. SADLY, I never did get it road worthy, as one day were were working on a '68 or '69 Chevy Camaro, the truck was outside parked along the road, in front of the garage in the late winter and a 4 door Chevy Celebrity came down the road flyin hit Anti-skid on the road and T-boned my truck! Sadly totaling the truck, BUT never hurt the 440 in it. SO Don & I both tried to buy the truck back from the insurance and they (hers) would NOT sell it to me or him.......Why? Well thats where Don & I both got a good lesson, that engine we had in the truck the 440 4 barrel out of a Plymouth wasn't what we thought! The block number indicated this motor was a 440 Plymouth Interceptor! AND WAS FULLY in tact from the '68 or '69 Plymouth Fury it came out of with all the "Interceptor" parts in the block, Cam, all that, it was all there...... With it coupled to a 4 speed Mopar transmission! So were S.O.L. on getting it back due to this fact! With that all said, now off to the model..... More explaining to be done with the pictures of this whole story as the kit unfolds!
5e1966fd8259056c01196741188c5ace.jpg

Now as you all know, I'm a big "stock" builder no less. BUT this truck model will be built as I had it started.....
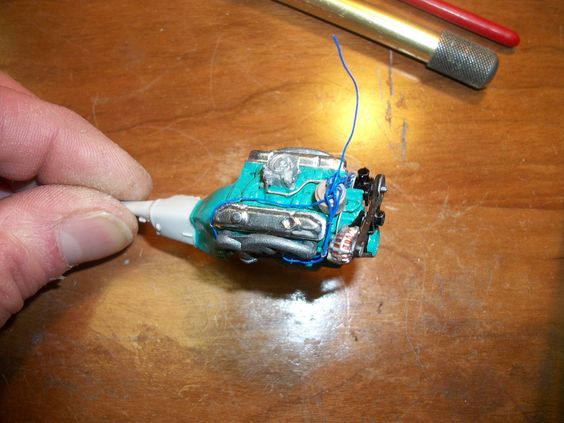
The engine before it went into the truck, was repainted the same color it originally was.....Mopar Engine Turquoise. BUT upon getting this engine in the truck Don himself came to me one day with a box, while I was sanding on the roof of a car in the shop to be painted, poked me in the arm pit with this box that had valve covers in it, pretty much NEW ones, I was like Don, those on the 440 are OK, I don't need new ones. Hes like take them, I have had these things and since you got an engine for them, there yours......
Pretty much NEW stock 440 valve covers, BUT, they were chromed OEM parts! 8D I got to say, I was a happy camper!
eb39cb5d83dfc7f0e6900e905f916a87.jpg

The belts are only "posed" on the front, I got a little ways to go on the engine yet!
2c22ac171017a141cefeaf9c371408a3.jpg

I got to replace the oil filter and mount, on my trip down south, and got home, I somehow managed to knock it off and lost it, but I can say here I am not hurt on it, as I wasn't feeling it all that much so, bad things sometimes happen for a reason, I'll replace it with a bit better done detail (was a gluebomb part!)
1571187c1c704c5dfc63df95d144dcdb.jpg

cea24c56f8821bfc67645e02289300fe.jpg

Then Don suggested, I remove the stock Carter AFB or AFC carburetor off the engine due to its age and replace it, which I did, got the transferring plate to mount a Carter Thermoquad in its place (better winter starting), which with the stock carb it did start hard, the Thermoquad once jetted right started the ole 440 with not even a grind start over the winter I worked on it like the Carter AFB or AFC carb did.....I was glad I did it! The last picture, shows the Thermoquad in place and fuel supply line going to it with filter!
More to follow right after these short messages! ENJOY! :D
 
So then while I been at it, I got to really looking at the frame to see what I was facing.....
b8d5b7ae5f516724c24997112eeb0305.jpg

Took this frame----^
It was to a complete '78 Dodge Little Red Express truck kit, and began designing it to be a 4x4 truck. the Little Red Express from Dodge was a 2x4 truck. So, as you all know me, that had to change!
I got to making my own front end, suspension, rear end, steering, shocks, you name it......
This is how that all turned out:
c7fbb9de77fb4e624f21970b5a91c808.jpg

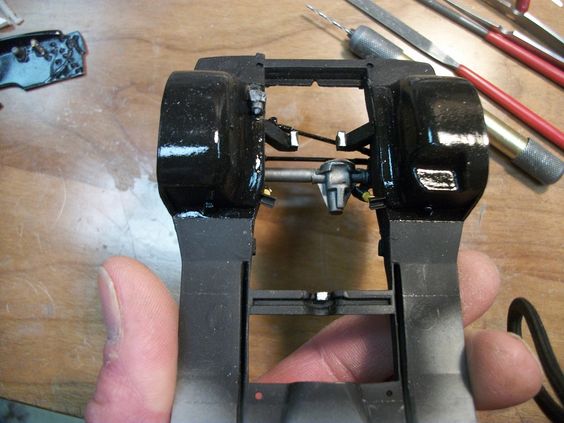
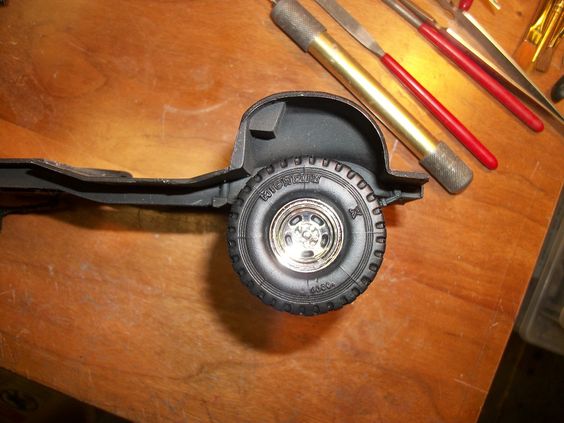
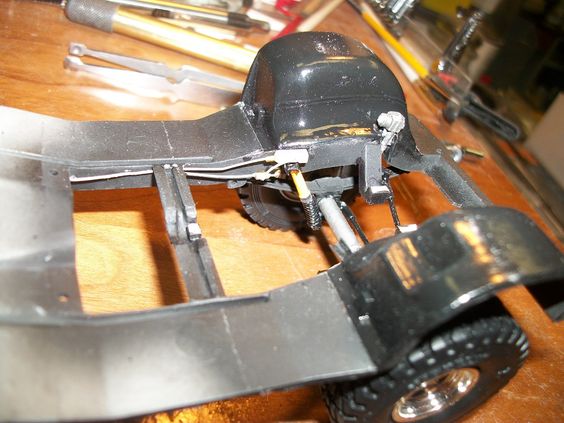
Top of the inner fender wells painted black, to match the truck, and glossed! You can see a bit of work I did under them with the suspension too!
d246de092e0c62eaed28c420067e7dec.jpg

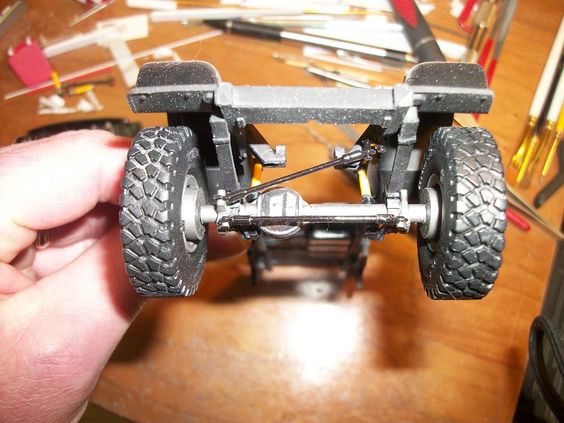
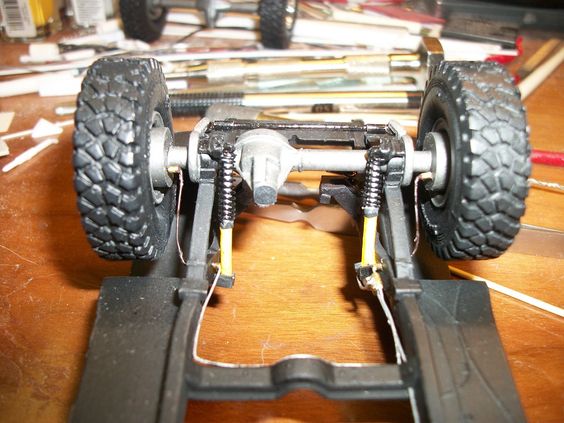
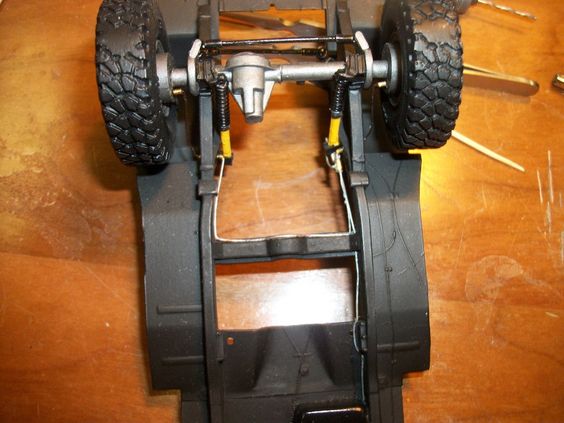
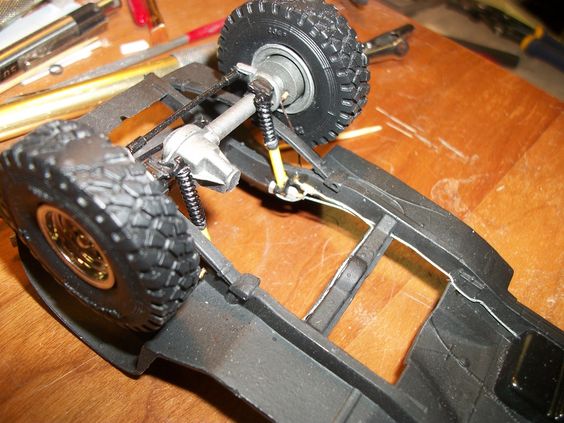
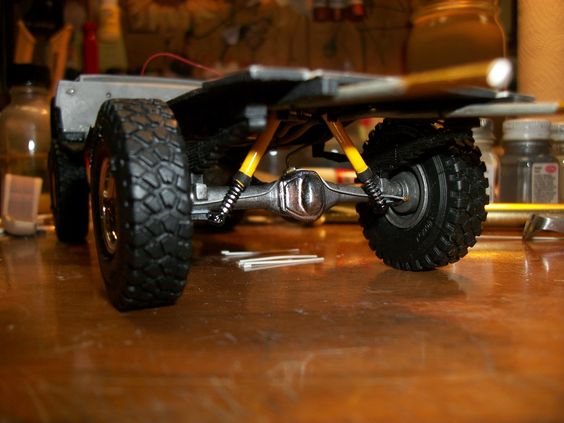
A VERY good shot of the front suspension, most of it is scratch built! The pumpkin on the rear is thee only true kit part, other then the leaf springs! They are not to this kit, from from some other kit! I made everything else, the shocks are partly kit parts, but again no to this kit, and not from the same kit, as the mounts were cut off something as the shocks themself were off something else. The "coil overs" I made myself to fit over the modified shocks you'll see a bit closer in a minute!
The entire "steering", is scratchbuilt! The tie-rod ends were a necklace part I bought from Hobby Lobby, and I think they look pretty good too! (I have to say I was surprised they worked and looked as well as they do! Metal too! The rods are all metal! glued into holes into the tie-rod ends! That actually lead to the bell crank on the power steering part out of my loose parts collection of parts! :D
I also had to modify the motor mount to hold the new engine as well! Left "stock" the motor sat oddly in it, so......
5f8f9ee2f9d415df9c879166bbc099ff.jpg

Notice the BIG tires, the real truck had these, but were never on the truck, as it was easier to roll around with the beater tires and rims that came with the truck. Don, the owner of the garage found nice rims he had for a Dodge that fit without issue! SO.....gave them to me, and I got the tires on the rims at least and the 4 of them in the bed of the truck with a spare rim to make a real full spare tire with! Also notice the front brakes! Was NOT disk, this truck had drum brakes on all 4 corners!
This also shows a really good picture of the shocks, that I also salvaged from the garage. Coil-overs.....
e803d81424d98a59ee6914e779c99a00.jpg

Fuel tank was replaced, with a better one and treated, this is shown too...... Not that it really "needed" being replaced, BUT Don yet again, had a way better in good shape one that bolt right up! Gave that to me too!
e6f44ecb1d5918a381f40e6ae82073d6.jpg

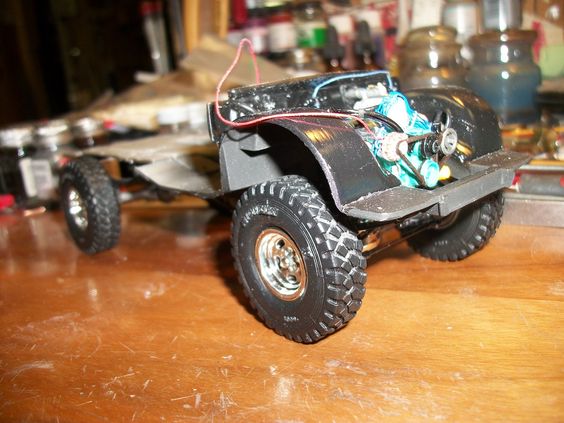
A good shot of the big 4x4 tires I had, they're not 100% exact to what I had, but the size is real close, and the tread too is damn near the same! With chrome aluminum "slot" type rims.....
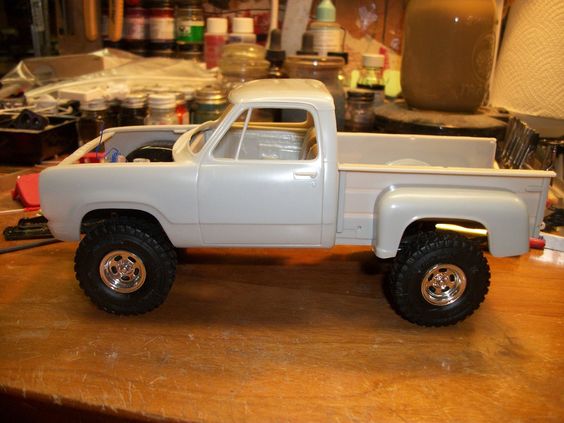
Also shows a bit of "stance" too, being a 4x4, and a Power Wagon, it was a high setting truck, to start with, did not need any sort of "lift" as it sat plenty high already, so I left that alone on the real truck, the trick was making it have close to that same stance as the real one did!
More to follow after these brief messages! :D stay tuned!
 
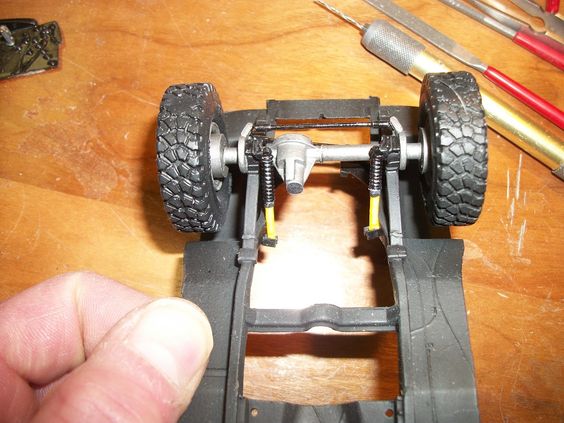
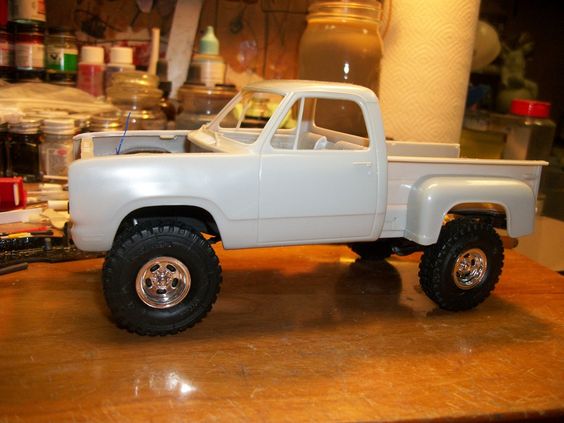
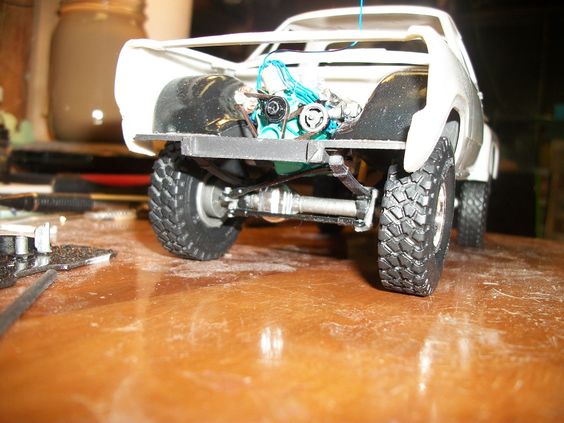
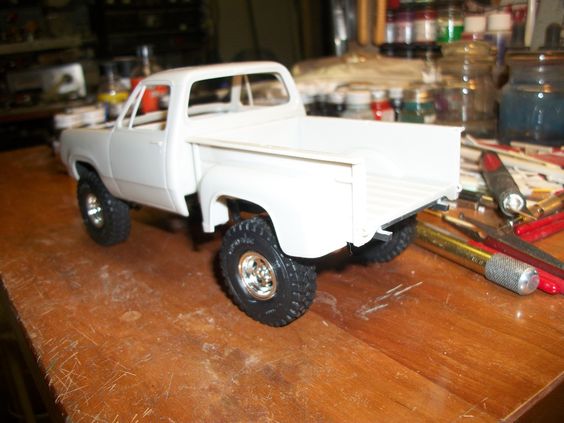
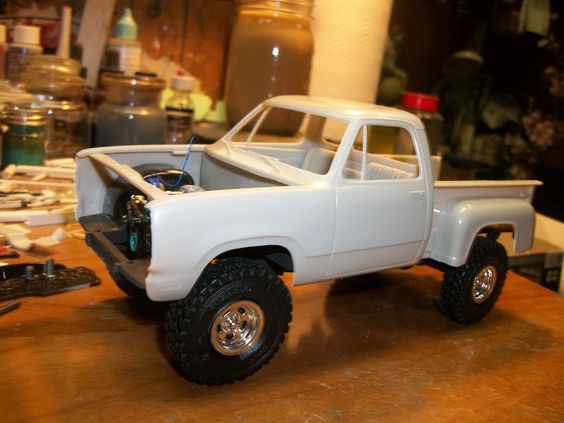
So then you see how all this is coming together.....I thought I'd get the rear end together (somewhat) and try to get a look at the trucks "stance" I got it did tho, it looks GREAT! Tires are resin models I had, and rims well, were pretty much the same rims that the Little Red Express truck came with! They aren't exact, as they're for a 2x4 truck, and my real one was 4x4, but they're close enough for me at this point........... I'm honestly surprised, I'm even able to make this truck happen NEVER MIND 2 of them....As my Dads truck I have not started yet, BUT it will be placed within this same build.... As he owned one at the very same time I did! Both trucks tho, were 4x4, mine was raised or well looked as tho it was, and his wasn't, it was stock height stance and stock tires on it, with stock steel "spoked" rims. And naturally mine being a step-side bed truck, his was a Sweptline "Straight bed" truck......
Pics of the stance:
66ef66a71353623e934df12b0876e32d.jpg

05ecb6a6a4d0fb77fea1ee158d32e213.jpg

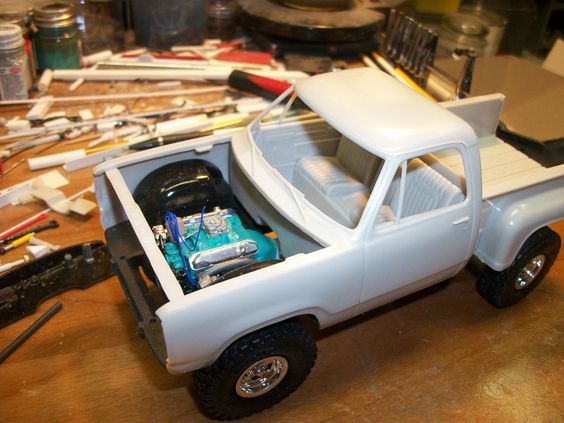
With engine setting in place!!!!!
9b180a58df6a38c9576dd60017204242.jpg

NICE under side clearance on everything engine, tires and rims, height, you name it it all looks damn near spot on to what my real truck was....... Sadly tho, I have but one picture of this truck in real life, and i can't seem to find the damn thing! As its not a digital picture! I find it, I'll have my wife scan it for me at the library at some point to post it with this build!
c2167c3267b172692823f39e7e3cf732.jpg

A bright shot of the bed in place.....
1afabbbcbe825ebcbc412dbf628dd2f2.jpg

4c108f6250e1d4bcbf9b80e8c2a5fd87.jpg

And just a few extras. this is where I'm at for now...... More to come as I'm able and have made some sort of progress, the frame tho is damn near done! I have to get the brake line mounts made and in place as well as the rear end in place and then detail the thing right up to go along with the rest of my builds being super detailed!
ENJOY! :D
 
So, with the weather being really decent, and doing a bit of yard work as well as the clean up from the trip I made to N. Carolina, I did get a little done and or worked on on this build this weekend! I got the front brakes and brake connections set up. I have yet to do some more but..... All in good time!
5973674b357fa9b338b8838cf6f84671.jpg

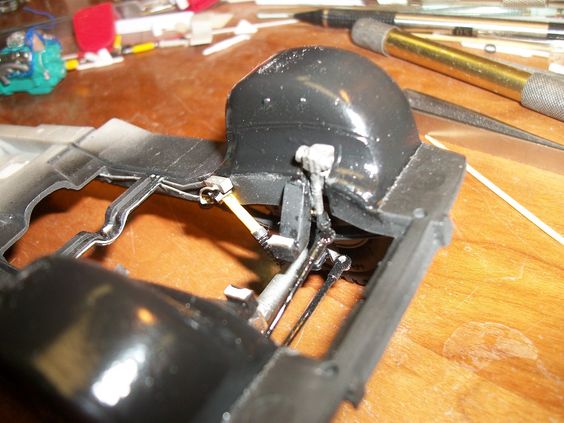
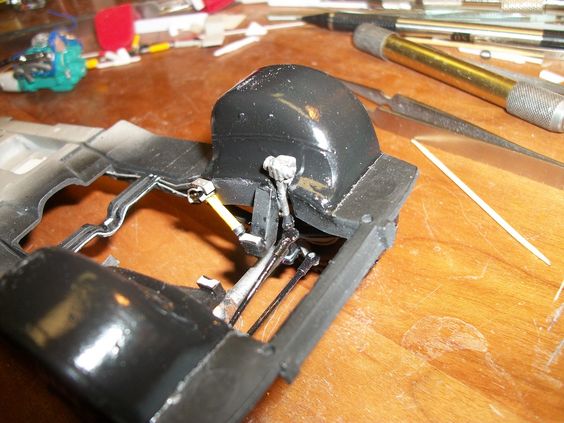
Showing a bit of brake line shaped and added to the frame for the front axle. I had to make my own fittings to the lines, as seen the lines to the wheels are hose, and otherwise have fitting through the frame, to a hard line that goes to basically a brake line/flow manifold, that sits on the frame just below the master cylinder on the firewall.
e392fbbb4d2a1e7de1b600c45644e293.jpg

Same sort of view just a bit more shown! That longer line on the right side of the frame is the brake line to the rear axle!
d54285e0ef83b25bbfd8f3f4f189bfe6.jpg

A bit more detail shown of the same bit, the manifold and all its connections seen here!
63fafbfb690bd15ed88519d923ea4bcc.jpg

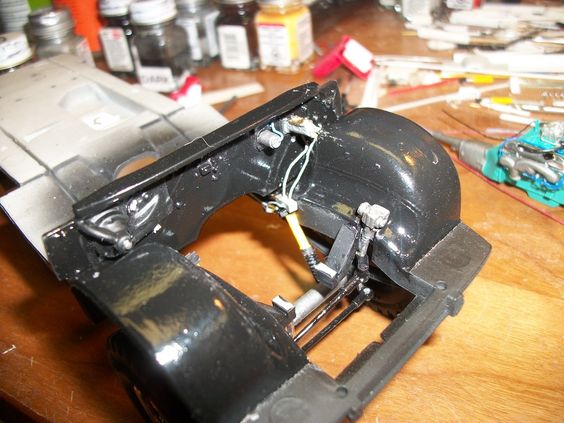
Right side up view this time. The brake line manifold is mounted right to the top of the shock mount! Makes it a bit easier to add the brake lines from the master cylinder this way! This also allows the motor to be in place or removed with the parts! JUST MAKES clearance here (It really is a tight fit!) As the engine is a 440 Mopar big block!!!!
517a7da849018baf9d8c6c41de2c6d43.jpg

Showing a bit of the steering parts I added to the kit. This was a FUN one to do, but looks good!
dc2c0adaa4305c64018eb2b8f9fdfd2f.jpg

Shows a bit more details and is a bit clearer to see what was added here......
Thats all for now folks! More to come as I have made progress!
ENJOY!
 
So how about a little update? For the Day as it is, 4-26-15. HAPPY HEMI DAY! I'll begin with the frame work and firewall on the truck. I added the details to the firewall, as well as the brake lines to the master cylinder.
47a889ac01a868d486d3523ff06078a4.jpg

Then, a little work went into the fuel tank and added details for such.
6004bad19c34d6efe33d1f516de74e38.jpg

Fuel lines, with fittings, supply and return.
So then now that the frame is pretty much done inside the engine compartment, around the engine where it will set, lets add the engine!
3639ff1b956ae541ac983c94c97df77b.jpg

f0f60a63b44ebc53c32d4f90d9a37b9b.jpg

b6aaf26f5aa2fa215c5e3191fc633f99.jpg

8d20fcaf2db0978614c149fca56578e1.jpg

928dc1789b8259600784d5345dc730b6.jpg

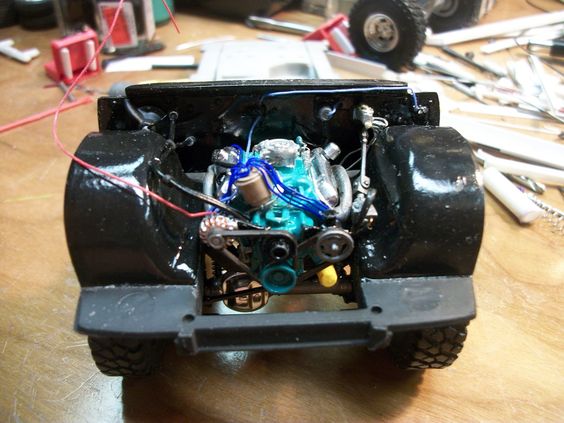
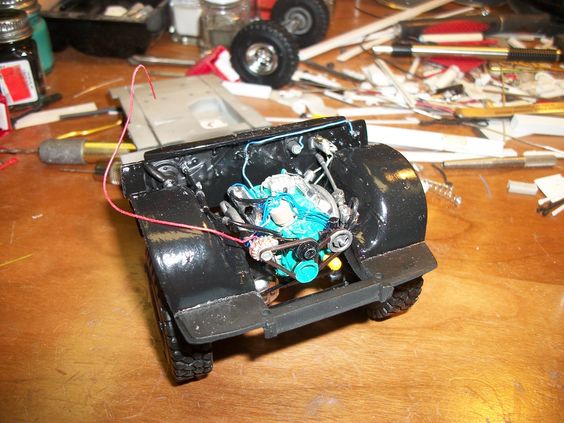
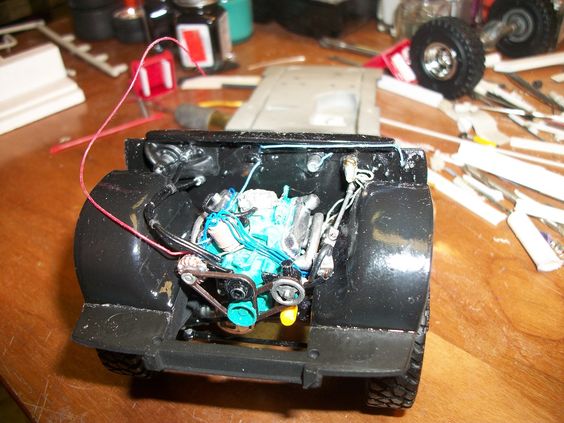
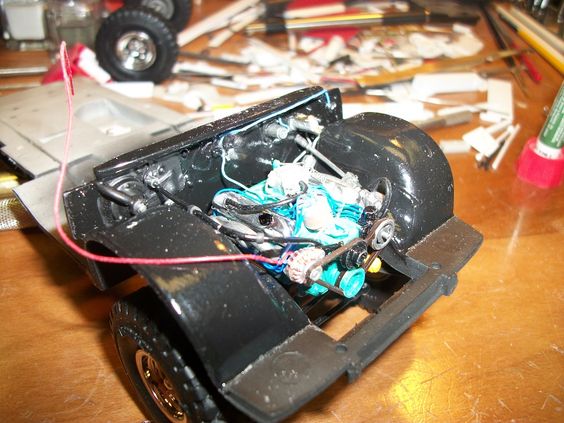
In these pictures, you can see, the alternator wires, to the coil, and the red one to the battery, the red one will follow along the radiator core support to the battery, the blue wire is to the coil, and into the firewall for the dash electrics. THEN you can see the wiper motor wiring, as well as the heater motor wiring, as well as the places all the battery cables will be going as well. THEN if you look at the engine, I got power steering lines to the power steering, I got the heater hoses going from the engine to the heater, WITH fittings as well. I also went as far to add fittings to the brakes master cylinder, as well as the steering shaft u-joint, that goes to the power steering from the steering wheel inside the cab.
More to follow, right after these short messages!
 
So, Being this model was started from a stock kit of the Little Red Express, truck, that truck was a 2 wheel drive truck, and my truck that I'm modeling here as a replica, was a 4 wheel drive truck, I had to come up with some extra parts! One of such, being he transfer case. This part I got in trade from our own Knarf. THANKS Frank! This was a GREAT detail, and needed a little "changing as it wasn't meant to be on a Dodge, BUT with a little work, I made it happen AND built the mounts to hold it as well!
ff75240b0ae5a7cf0a99bf7120270fb5.jpg

This part, was made to have the pumpkin of the front axle to the drivers side of the truck where as the actual Dodge truck had the front axle pumpkin to the passenger side of the truck. SO I had to make some modifications to the whole set up as well as the front axle, too, was scratchbuilt, using some existing parts I had laying around!
With this all in place, I think it looks pretty good and going from memory, I think I am getting the look on the model that I had on the actual real truck!
dd21f48b181769e89e14d4650199542d.jpg

Thats it for now. a lot of little details that doesn't look like much in the big picture, BUT thats allowing that much closer to finishing the model itself!
ENJOY for now!
 
Well a little further on this..... I got the front exhaust in place to the mufflers, that in itself was a trial to get the pipe bent correctly to fit! BUT thats how it was, or close too how it was on my real truck as when I got the truck I knew and so did the garage owner (he got it for me) that it needed new exhaust so...... Thats what it got!
c2e23e3c831d4947dc964c47c3a16b2b.jpg

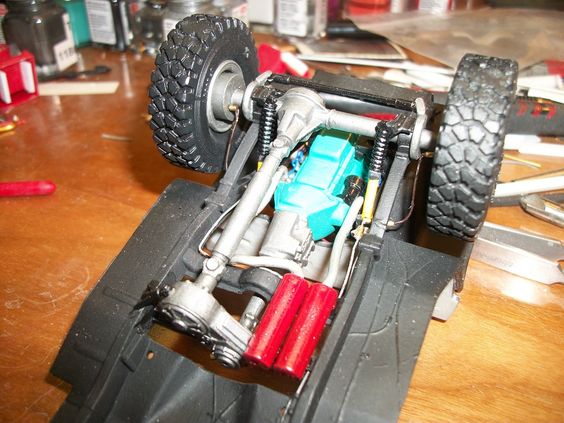
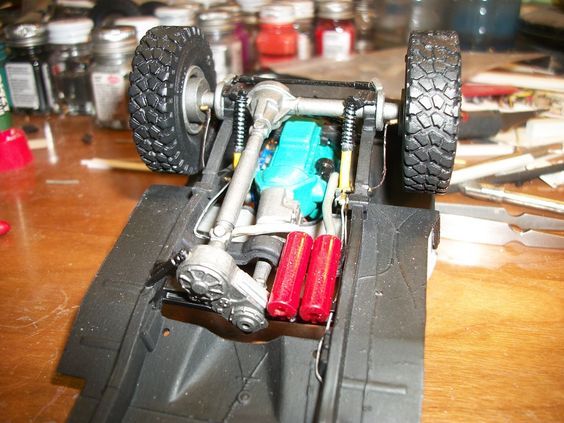
This shows that it also got the front drive shaft as well, as the exhaust pipes had to go in first, to then be able to add the custom made/fitted drive shaft!
fe446923bca5e8b6cd2e9689920b9632.jpg

Same thing different angle of view!
787f31603656fe858fc5900af69a953a.jpg

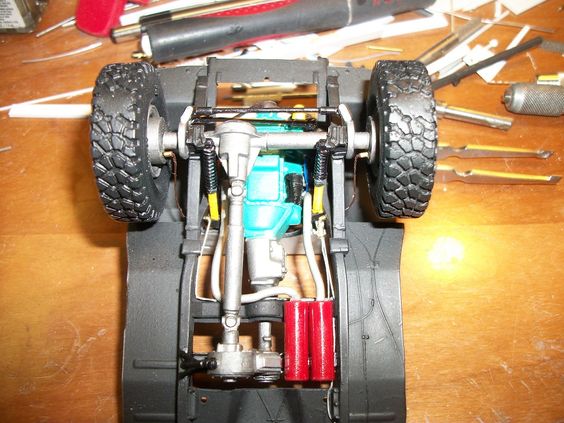
Showing that the red mufflers were placed side-by-side to then be able to run the exhaust within the frame rails as the model had "stacks" which were running the mufflers outside of the frame rails under the the floor board/pan and just inside the rocker panels of the cab on both sides. My truck didn't have "stacks" so that was all not needed and really, I wasn't impressed with the mufflers the kit supplied as these used were closer to what I actually had on the real truck!
2335ae2110f15f56f6f0ce129f983613.jpg

Showing the rear most part of the mufflers having been drilled to take the new formed tail pipes..... I have yet a little paint touch up to do BEFORE the pipes are bent to go in place.
3cb1062fe0a0f2a6c85c519c735b93ea.jpg

"above" pic, without the bright flash of my camera, to allow some less "flash" and to let the details be seen instead of flashed over..... As the paint is bright, added with the flash hides a lot details I find at times.....
I also have yet to add the rear differential as well, as it has to have the exhaust pipes "in-place" before ANY of that can be added as I am not fond of "fishing" pipe through all that when it can wait till the end and save me some frustration trying to get it all in place AND this allows me to add pipe hangers, and any other small details without a lot of trouble!
Stay tuned more to come as progress is made!
 
So to continue on....... John got the exhaust tail pipes on the truck frame! Lookin' good I gotta say!
6a04b8dd38a2f6d4a328f9b1f4ac9b9c.jpg

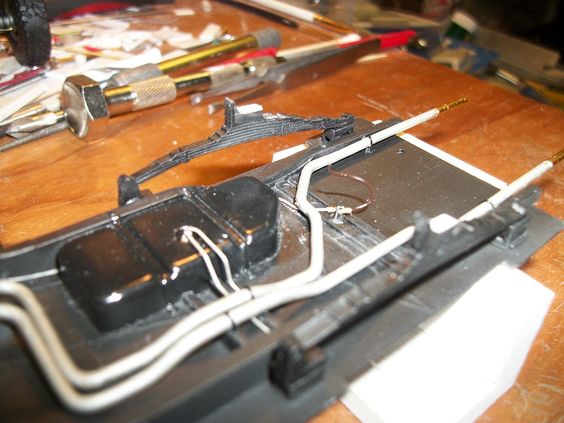
If you look closely to the rear suspension, where the axle would be placed, center of the leaf springs you can see a Testors "rubber" colored wire, this is the rear brake hose to go from the cross pipe on the rear, to the hard pipe mounted to the cross members of the frame. Look a bit closer even still, you can see the mount for that on the cross members as well as the fittings!
8c3946d5fd6f2b2c831d157bdcb93a23.jpg

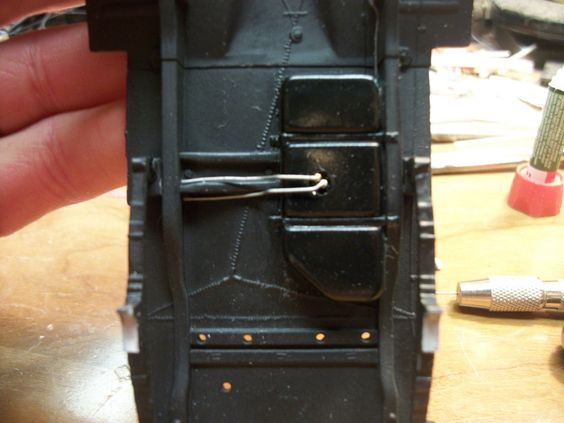
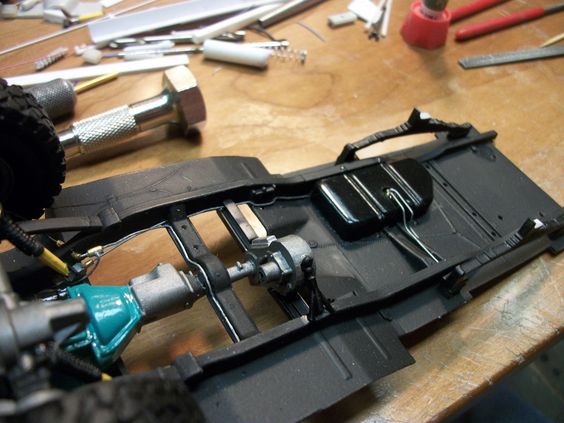
A different view. You can see the rear brake line coming out from behind the fuel tank, going to the mount, where the hose fittings are, that would be to the hose thats headed for the cross pipe on the rear.
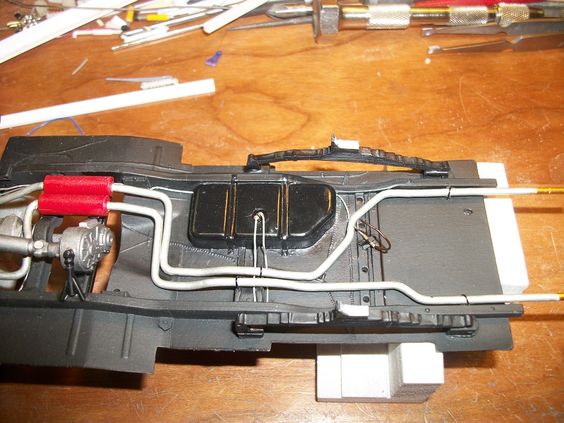
Also seen in these pictures is the exhaust pipe work I done. Notice the pipe hangers in various locations. ALL pre-bent to fit the location its placed in, as the real truck would be if I still had it.
c8e1a6393cb25203d935b8b77af387b7.jpg

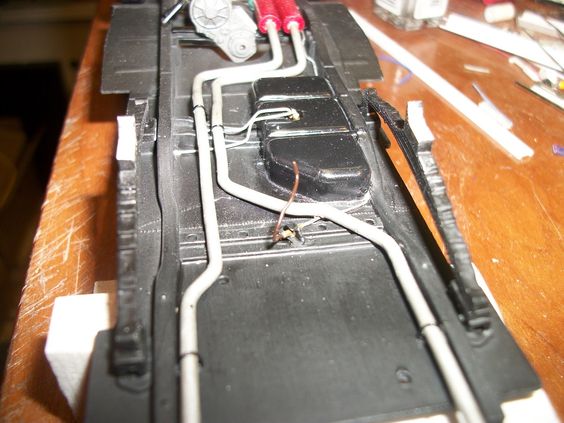
Looking at the whole frame from the rear, seeing the hose for the brakes, in the center of the frame. As well as the way the exhaust pipes were ran. The black exhaust pipe hangers show up well here!
I left the ends of the pipe "long" for the finish of the model as I will have to bend the pipes down from behind the hanger to get past the bumper once in place, and then "tips" to be made and added when all said and done, that will be the last details added to the model when its all done!
Now that the exhaust is in place, I can move on to get the rear end in place as well as the rear drive shaft, and suspension completed!
Stay tuned more to follow after these short messages......
 
So as I said, short messages! LOL :D It was going together so well last night, I kept going!!!!!
f79bae193bb3d9b750920ccf8f645840.jpg

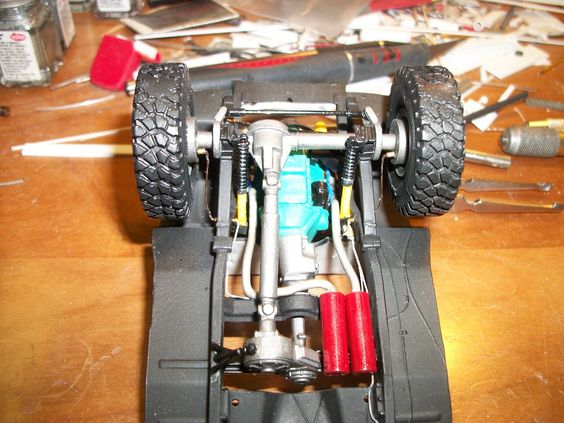
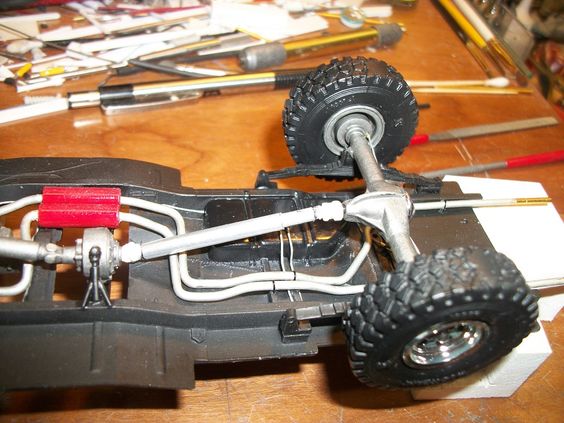
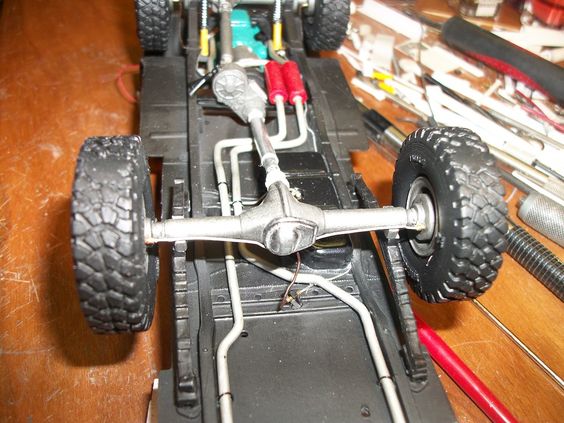
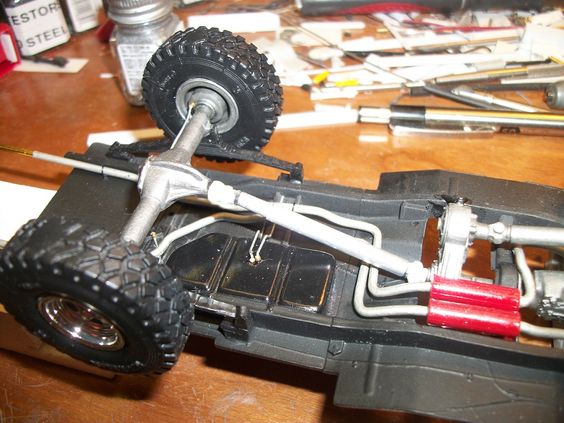
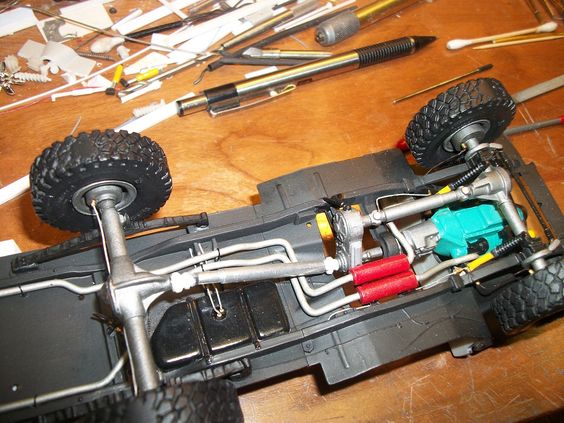
As you can now see, the rear axle in place, as well as a custom fitted drive shaft that wasn't painted in this picture and the following ones BUT is removable! IF you look, you can see that there is 2 telescopic aluminum pipes that slip together, just like a real 4 wheel drive truck and even most rear drive cars, the drive shaft is slipped to have a section slip into another section, for suspension adjustments when in motion. I make my drive shafts much the same way! AND it allows me to play with different placement scenario's to see which way "fits" better to the part(s).....
ad85410006075f353a03e894e66f3f53.jpg

Rear view, to show the details from the up-side-down frame and that little brake line hose leading to the rear end pumpkin.....
bcc348cc39ad06509ba4e4535cf00a37.jpg

From the other side.....
ac4a02063ecdd1c47fef952e90f8ae49.jpg

A shot from above down-on to show the over-all of the frame......
A LOT of details and some yet to go! I have yet to add rear shocks, just like the front ones, they too will be coil overs as the real truck I had, was equipt with. (Came to the garage owner that way) and were in pretty good shape, so I left them on the truck and this model will reflect that! I have to pull out the shock supply to see what I may have and or to see if I might have to build my own from tubular plastic thats telescopic due to the nature of this build, the stock kit supplied shocks won't be long enough to go from the bottom of the rear axle to the bottom side of the beds floor boards, so...... We'll see! This all will happen later tonight! But as of this posting, the drive shaft is now painted, glued in place, and ready for shocks to be added!
Thats all for now folks! More to follow when more is completed!
ENJOY! :D
 
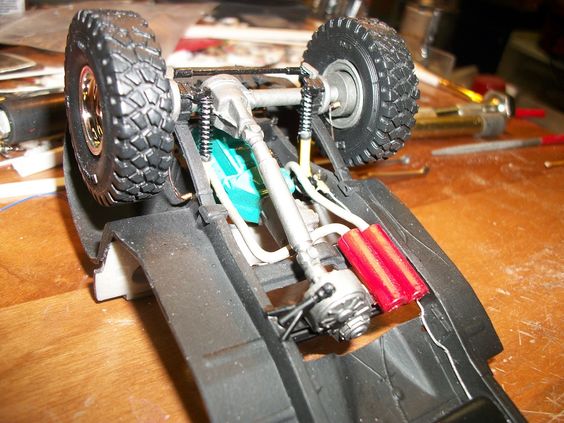
OK so a bit more to add to this build. I got to thinking I took pictures of the drive shaft work as well as the underside details BUT this was done when the drive shafts were unpainted! As well as a good "stance" of the over-all frame. So, with that said, have a look:
14ff959ba97d13e8c0b5067e9a3b1634.jpg

Pretty good shot of the passenger side front corner and to show the trucks height as well as the tire details! Looks pretty good!
f398e138534edbd1629fd58c719273eb.jpg

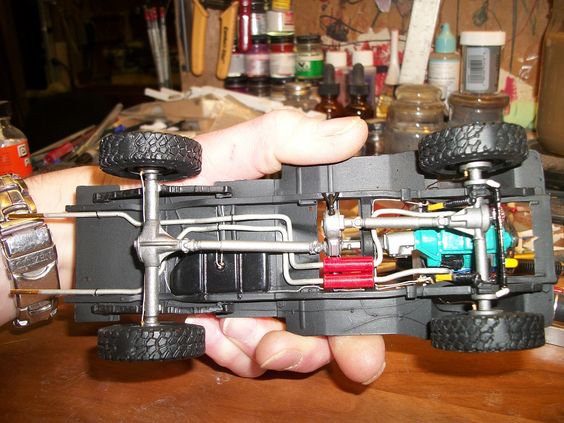
A good under side shot of ALL the underside details I added! :D
Also a good picture showing the custom made exhaust and hangers, as well as the custom made drive shafts too, with a custom fitted transfer case...
003aa58b6512c557a2c5695e1888fe00.jpg

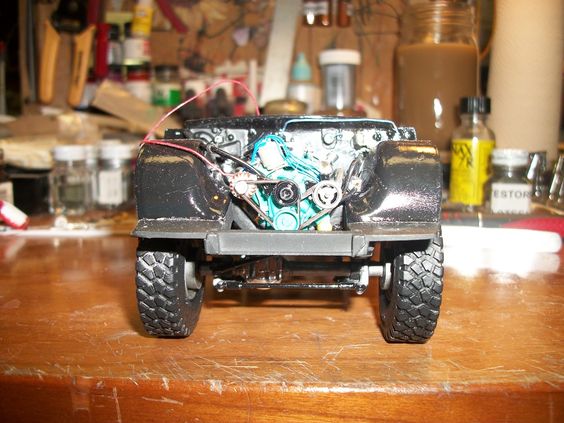
Head-on shot of the front showing the engine missing the fan, and radiator core support as well as radiator, that part was curing when this picture was taken and is almost ready to go onto the frame! I have a little detailing painting to add and some extra detail to put into the build!
76b4fde956dda04cd8ba459c2e056d53.jpg

Like the real truck this is following that I owned awhile ago, I had added chrome differential covers to it. The front one can be seen here, as I had chromed the pumpkin cover, and all the steering and tie-rod ends are scratch-built to fit the truck as well as the entire front axle!
136d8d77d911bcd05e9f3dd36e20105d.jpg

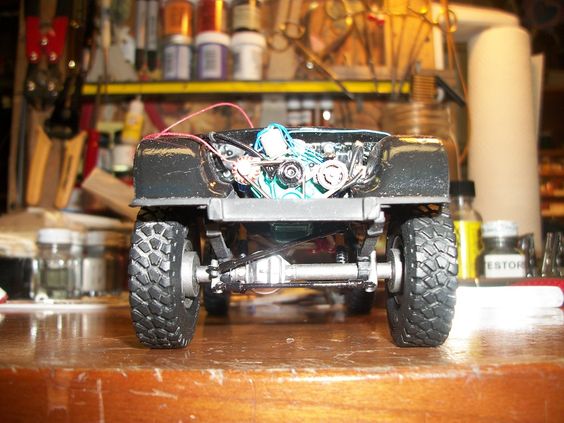
Picture of the rear differential, showing the chromed cover in it as well! Also seen here is the tail pipes left, "long" for bending down under the bumper when in place! This will allow me to adjust them as needed for the truck when that part is done (that part of the assembly will probably be the last detail I'll add), just before the truck is actually "complete"!!!!
So far, all looks GREAT, I have yet to get the interior started, its setting drying right now as I sprayed the common interior color and then when dry, will go back and detail paint what I can as well as add "carpet on the floor. My real truck was all black, with a tan interior, that was a real close match to the Little Red Express trucks, as the interior was removed for the original truck and replaced for a cab that simply had a good tan interior, better then the one that came with my truck when I bought it, and the interior I put in the truck was give to me just to get rid of as much as it that was useable, to then scrap the cab (was rotted out pretty bad) so, the interior however was used, but in way better condition then what was in my truck when I got it.
Thats it for now, more to come as progress happens! ENJOY!
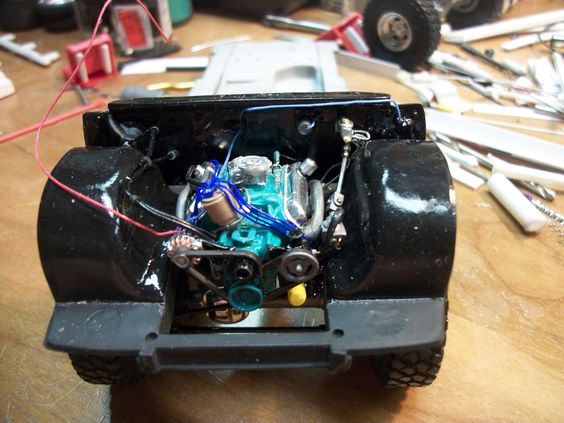
 
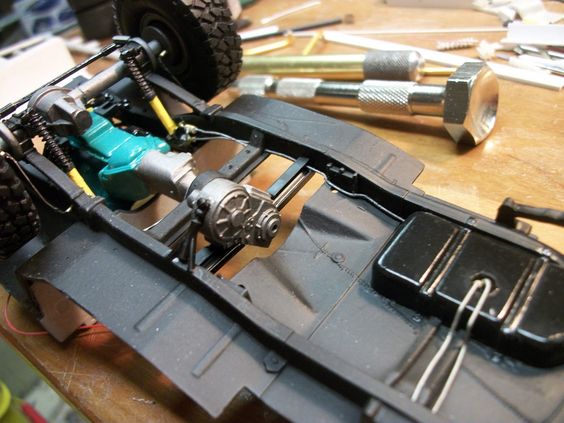
OK as promised, I'd have some pictures of the recent posting of progress I made (I had to be in a good place to stop and get pictures!)
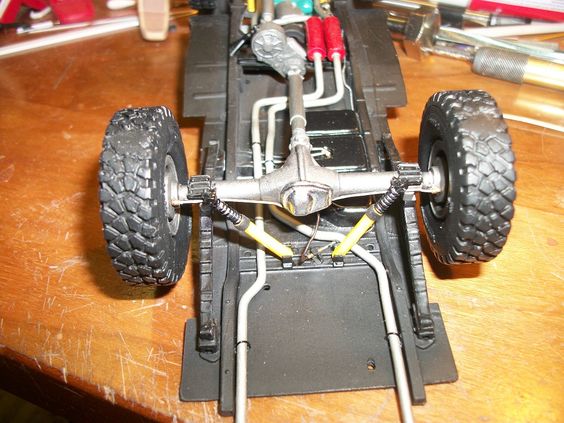
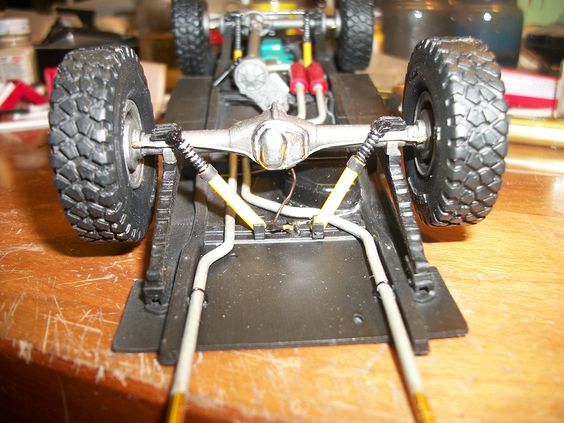
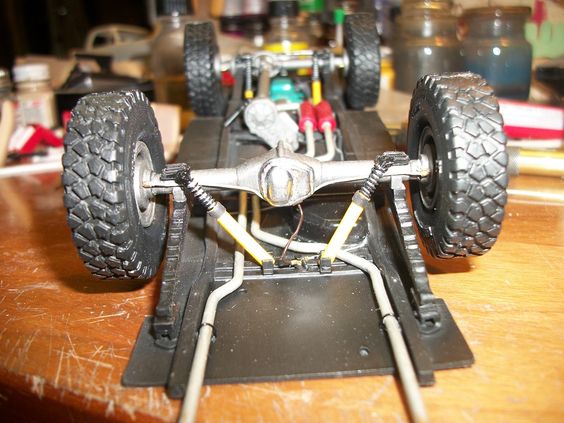
Anyway, the rear axle now has its shocks in place, they like the front ones were custom made, from existing model shock "mounts" to where they go on the axle, and then have the "barrel" or telescopic parts custom made from evergreen styrene, cut to fit, and had a coil over spring added that I also made with a spring mandrel in my lathe and spring wire guide.
ab9a3da77eb9634828ae68be1fbc621e.jpg

d1b80105aa0695c1b8575ba48ead530d.jpg

The pics here show them, quite well also shows the custom made angle iron brackets to connect them to the frame. The rubber grommet around the shock nearest the coil over spring is to be like the real ones that were on my real 1:1 truck at the time....
e3a92ab1234c17b314c08cc1d49d7176.jpg

Slightly different view just a bit "over-head".
2d91278e07a7f3de476e95d43da26f75.jpg

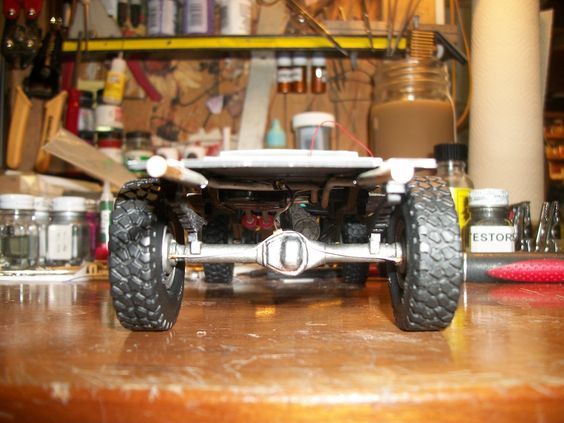
Same thing, just the frame setting on its wheels to show how they look as well as showing the chrome differential plate a bit better then the pics I took to depict it!
This actually "completes" the frame at this point, The next things to be done to the frame seen here is the added bumpers both front and back as well as the tail pipes bent down around the rear bumper, and "exhaust tips" added, BUT those details won't be seen till the very end and will be the completion of this particular truck model in the set!
Interior is up next! ENJOY!
 
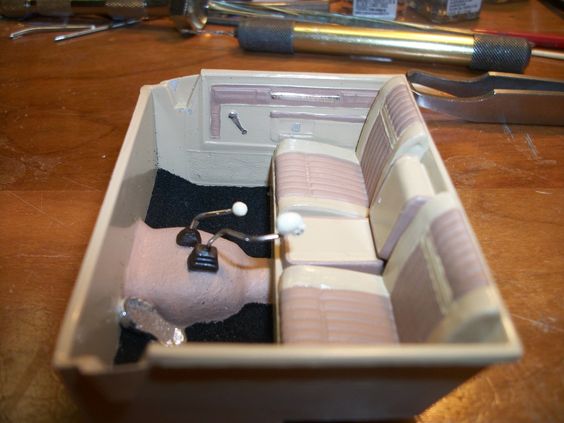
OK, I mentioned it, now comes what I been doing with the interior of this truck. The real truck had a tan interior. In poor shape I might add, BUT working for the garge I did at the time, the owner Don told me if I needed or wanted anything for inside the cab to look in the "grounded" truck cab to what was a Little Red Express out back of the shop. So, me being me I did go and have a look, the cab was in pretty bad shape first thing I noticed but the interior from the outside looked to be in pretty good shape, (what I could see of it from a distance) as the windows all were wound up, and there was A LOT of under growth around it. So, back to the Garage I went, and into the office to talk to Don about what it take to get to the trucks cab, and if and what was in it that be of any use to me, (I was unsure), he told me, it was getting hauled up next to the garage the following Monday, as if I remember correctly this was on a Friday afternoon, OR Saturday, I can't remember exact, BUT come Monday morning, I was to come to the garage grab my chain saw and he'd have gas and bar oil ready for me and a weed wacker and some other tools to clear a pathway to it.....
Well needless to say, we got it out from where it was, up next to the garage, and able to get into the cab, and boy, let me tell you the cab was in some rough shape! It sat on the ground for what Don told me was at least 8 years, as they got a whole truck in and the frame was in half ways decent shape as well as the bed of it, the truck had hit something (large) as the front was mangled up a bit and rusty, whatever it hit, was high enough that it took out the radiator and grille but just missed the filler part that ran under the grille to the back of the top of the front bumper..... BUT the interior tho, was in pretty good shape! BETTER shape then the truck I was building, WAY better shape! Dash pad had a pretty good rip in it, so I left my original dash where in the truck, BUT the cubby hole cover was good mine wasn't and the seats were untorn ANYWHERE, so I took both of them as well as both interior door panels. As my trucks had a bench seat in it with rips EVERYWHERE or so it seemed at the time as well as the interior door panels on my truck wheren't "ripped" anywhere but were simply raty looking compared!
Now to get to making the model like this was in my truck, a few things may have been different, but I'm going from memory so not ALL may be 100% so..... But at this point, I'm good with that!
e0a0a81570f902453c0b17e58d9f257a.jpg

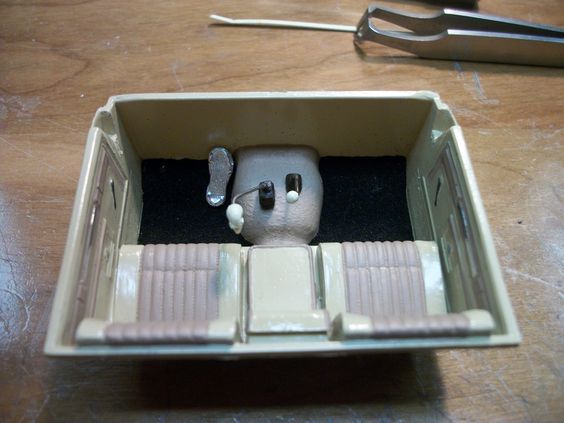
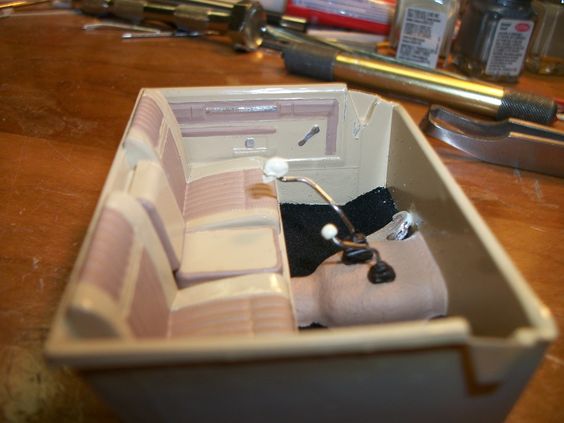
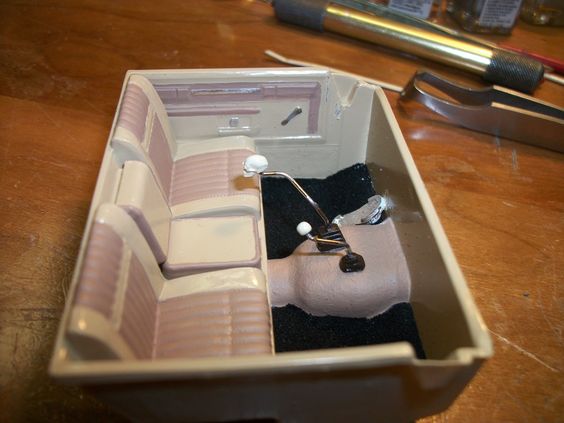
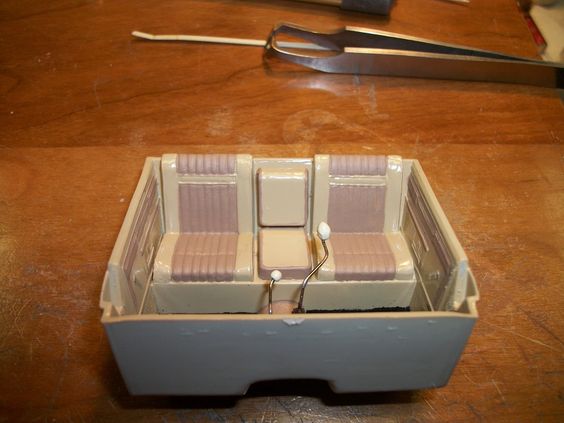
A few things to point out here..... Notice that the cab has bucket seats, my truck originally didn't, BUT the donor cab had all that in good shape! The only difference I can recall was the seats..... Notice the seats have 2 different colors in it, both "tan" but slightly different shade, they were like that on the real thing, BUT the "center" grain runs length-wise on the seats seen here, on the real truck, if my memory serves me right ran side-to-side. I can live with the difference!
Then on the real truck, the gear shift to a 4 speed transmission had no gear shift knob, NEVER did and the donor truck didn't have one either, SO with a bit of modeler's license I took and added my own rendition, a "skull" gear shift knob. Thought that was a good way to add it in. The accelerator pedal on my truck was an unpolished aluminum "foot" NOT with any "tread" on it, but the detail I used, I think looks good! AND the the carpet, in my original truck it was tan, the darker of the 2, BUT the donor cab had good "black" cab carpet so I installed it, as there was no rips, or rot in it as the truck had when I got the truck I was building!
0741f876aa54b7c3f9fb27fa98d1f126.jpg

9aad4e9f26d0ddd65eea4ed1017c1c82.jpg

412a5412949da8fd0a1c93d55afe3f22.jpg

showing the door panel details a bit better as well as the seats. That chrome strip you see is to the band that was like a horizontal door handle, my original truck had solid black ones, the donor cab had nice chrome ones that I musta polished on for an entire weekend at home before they went into the truck!
9f5737ca6b5068e5c215ef1c759bf4ad.jpg

Then last but not least, looking as tho through the windshield. Showing the seats a lot better now..... ALSO, something else that was slightly different was the gear shift "shaft" my original truck had what looked to be a "blackened" shaft, NOT painted black mind you, but darkened metal. Was "OK" but just didn't stand up to the one in the donor truck, being chrome. Needed polished which I did and had just a little rust on the bottom end of it where it was connected originally to the donor trucks transmission, BUT wasn't to bad to clean up to make useable again and in working order, so that too got changed out!
Dash is next! Stay tuned!
 
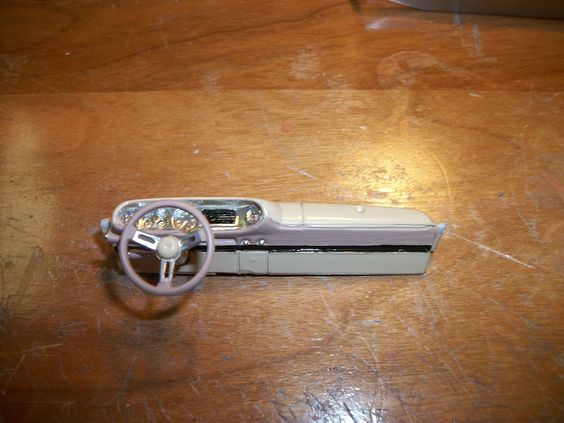
So, with the interior of the truck posted, the missing part was the dash.....
On the real truck, all I replaced to the actual dash part was the glove box cover. As it was a matching, or sort of matching color, I was good to have one with NO rips or what I recall remembering a slice or something in the glove box cover, SO, it got that from the donor cab!
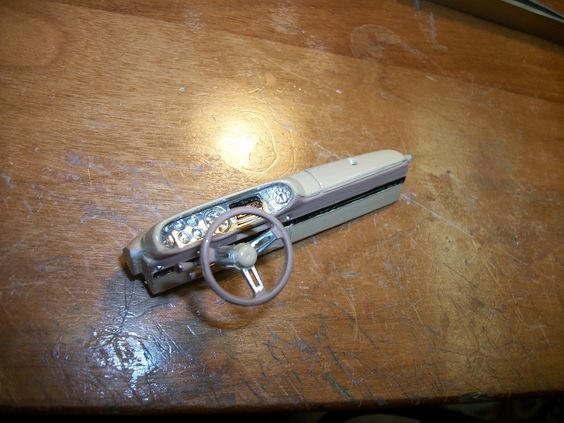
I also changed out the steering wheel, and column, as the one in my truck, was "OK" its just the donor truck had tilt steering, and a nice aluminum centered steering wheels! SO, while the truck was setting with no motor in it over a weekend, I added these parts by myself to be inspected come Monday morning as the garage opened for business. As the Owner Don had it a PA inspection station so.... -just before the truck was rolled outside to open up that bay for business that day!
bc5b0d846d2c53addab2c30fc73cb5cf.jpg

141706a056397adcb85de94828bb0ac8.jpg

I left the dash keep its original chrome plates that went around the gauge clusters as those in my truck were actually the one of very few things in really good shape! Seen here I used BMF to add them. The gauges themself were black plastic, but because of how well the gauges turned out on the model I left them be BMF chrome as they show the details a bit better then I could have EVER painted them to be seen!
62203aaf462afc722cc889f4d0539444.jpg

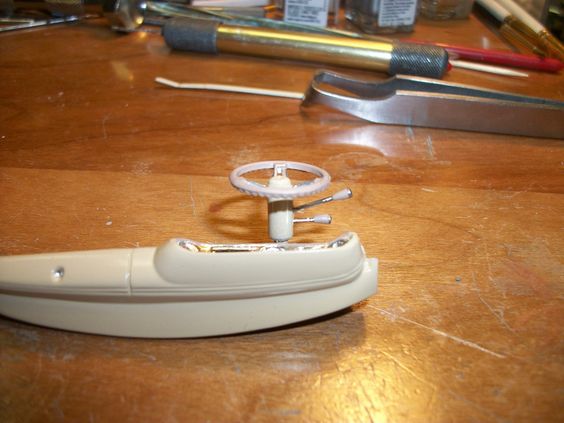
The model itself out of box, did not have a turn signal lever OR anything for a tilt steering lever, SO I made them to fit the column! One thing I also noticed with this truck, was the interior came with having a "automatic" transmission, NO clutch pedal! And thinking of it a bit, the engine itself came with a standard transmission! SO having said that, and my real truck being a 4 speed manual, I had to remove the single pedal for the brakes, and leave the gas pedal to add the chromed foot, BUT I have to make a clutch pedal, and a brake pedal and while I'm at it, I'm going to add in a emergency brake pedal as well! These have yet to be added! Granted, the interior is almost done as well. Once it is, this whole model will be sat aside to allow me to do the same sort of work to the truck that I'm modeling after my Dad's truck and that truck will as well be in this same thread! As when it comes to painting the 2 trucks cabs and beds, they can be done at the same time due to both truck being black! So really, I'm almost a 4th of the way done!
ENJOY more to come as progress happens!
 
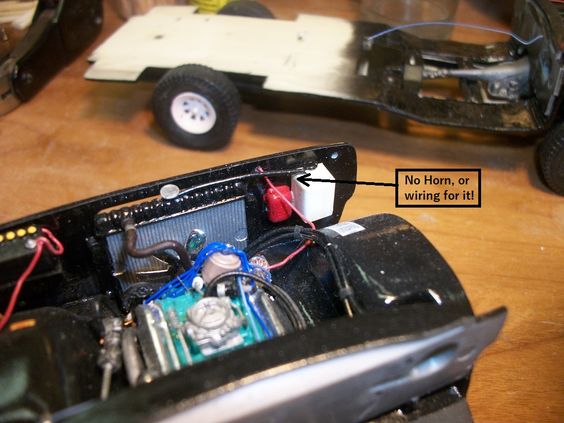
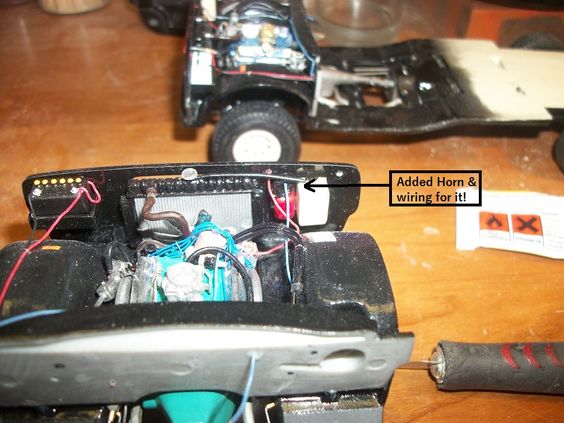
So then, as I said, I remembered MY TRUCK. it too didn't come with, or have added in a horn! SO, I got out my spare parts again, looked through and low and behold, I had another EXTRA horn of the same that I used on Dad's truck to go in my truck.. PHEW (they had to looks somewhat the same!) So. off to painting this one black as I did the one that went into Dad's truck AFTER the flash was cleaned off around the edges, and the hole was drilled for the horn wiring.....
So you see in my truck:
ddb8afc077e7ac4854a6b3e24e44fa93.jpg

NO horn! I was right, I didn't add it! While looking my truck over, I also noticed something I didn't add when I was building it!
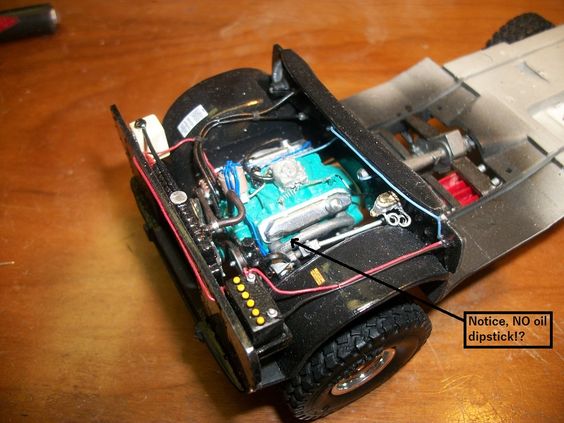
7596e2455c5c1043a6bc3fceae1e69e9.jpg

On a small block Mopar engine the oil dip-stick is on the passenger side "front" of the engine, near the head. On a big block its on the SIDE of the engine, on the driver-s side of the block. -My truck had a 440, 4 barrel in it. SO thats why the arrow is pointing where it is, thats where the oil dip-stick should be! And, its NOT! I got to thinkin' right then, Boy this is gonna be a fun detail to add while the engine is in place, NOTHING like it be on a real truck LOL
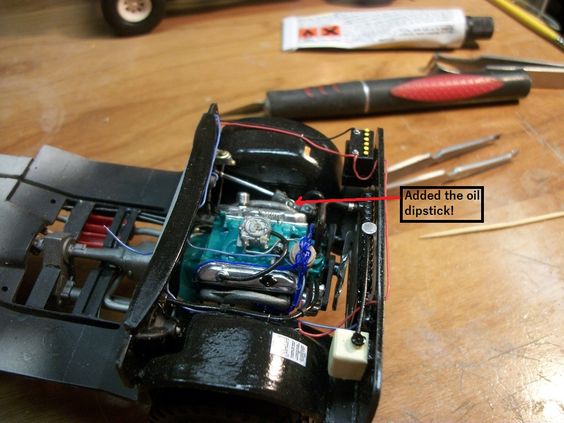
But I got the part made, and then painted the lower part of the wire the same color as the engine and let it dry, and went off to add the horn and its wire, same as I did Dad's truck.
Once dry, the oil dip-stick went into place, not as difficult to get it in there as I first thought, I have to admit!
93bcd4da7df787a3a643491bfd307b35.jpg

Looks GOOD as on my ole truck this part was Chrome. I made the detail reflect this. Looks great! I'm pretty pleased with it!
Then I let that set a few and got a refill on coffee, and once I returned I began adding the horn and wire.....
a9597886cfb7ea02f74093943cea4bbc.jpg

One thing I noticed, it wasn't nearly as difficult to add the horn on my truck as it was my Dad's.... Dads truck has a lot extra hose and stuff for the A/C his truck had almost to the point of clutter, so was a bit more challenging weaving the horn wire in his truck, then it was mine, all I had to weave around is the heater core hoses!
So then, those couple little details, brings my trucks detail level up to where I took Dads in this build. I'm happy with it, NOW its back to Dad's truck!
Thanks for looking, stay tuned! More to come!
 
NOW A pause......... I sat "My" truck down to get right into building Dad's.... They both were build side-by-side Simultaneously....

So the following postings will be of Dad's truck! -ENJOY!
 
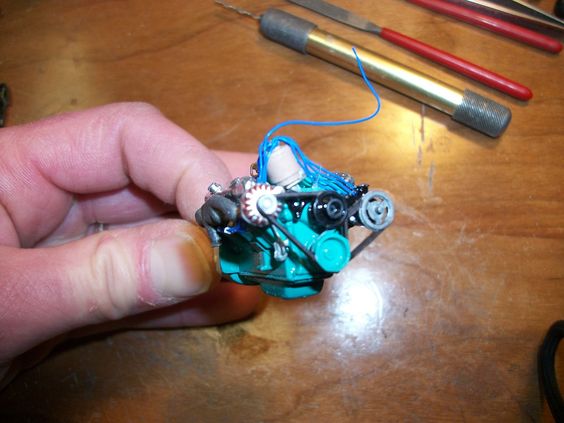
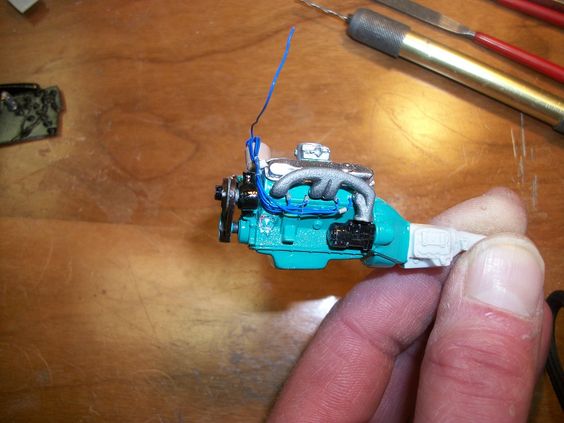
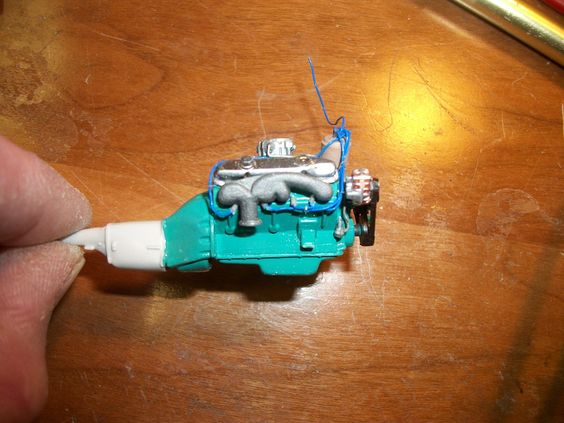
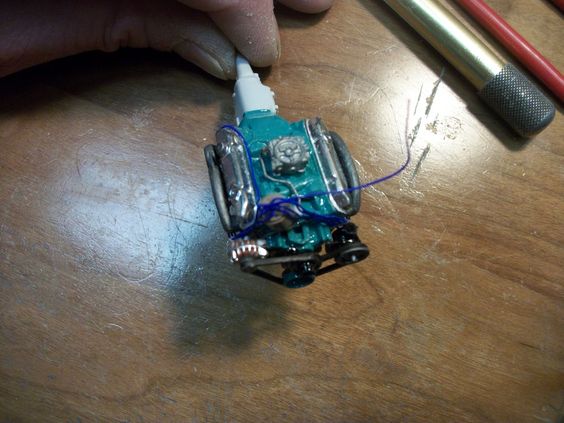
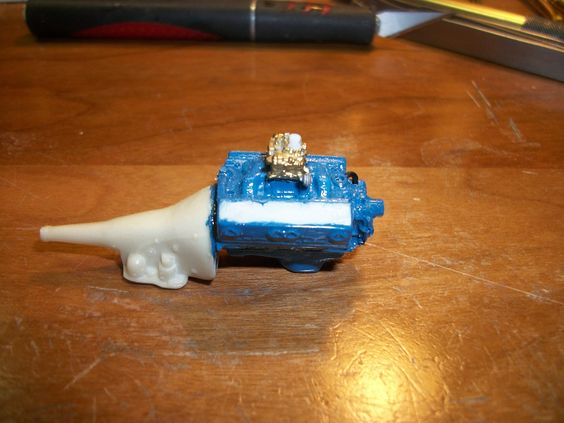
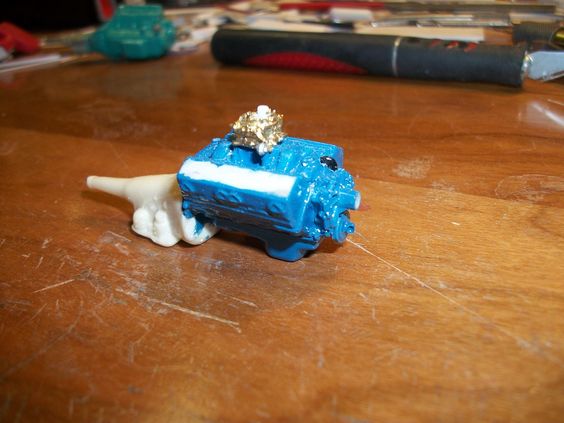
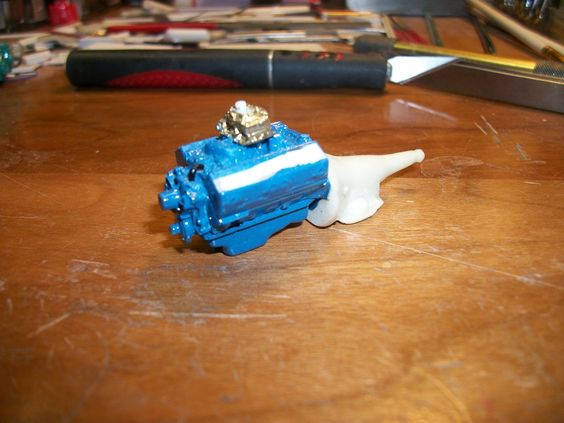
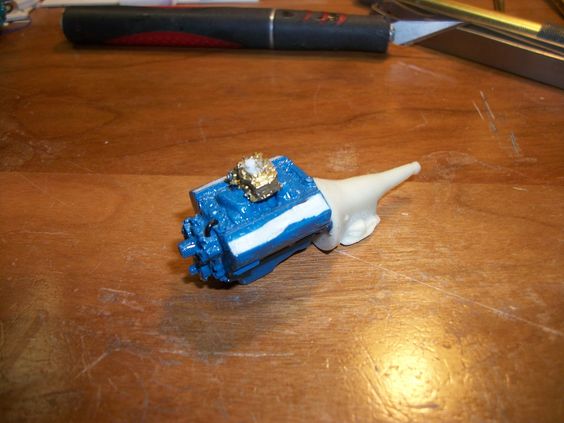
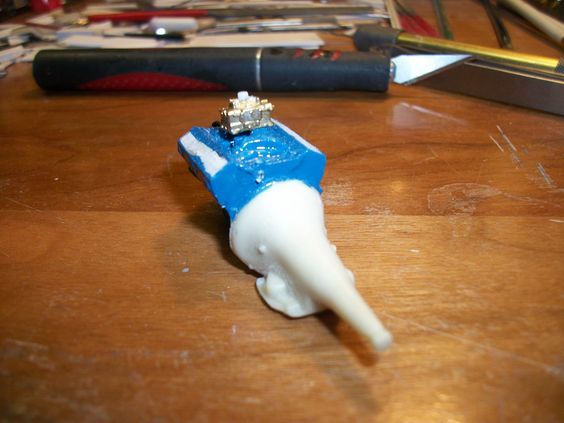
Now, as I have mentioned in a few postings during this build, my Dad's truck was next, to follow suit much the same manner as this one. WELL, a few slight differences between the 2 trucks. One, Dad's was a '79 Dodge Adventurer 150, 4x4. This truck had a Mopar small block in it, I myself can not remember if it was a 318-2 barrel, or a 360-2 barrel, or 360-4 barrel. I'm just NOT sure! The nice part is, stock from Mopar, the engines looked exactly the same from the outside! EVEN the carburetors! The Carter 4 barrel was the same as the Carter 2 barrel, the difference was inside, the 2 barrel had the locations "closed off" and no venturi's in it. Where that same spot was opened and had the venturi's in place for the 4 barrels! (Interesting) but that made them use the same common "casing"!!!! SO with that said, I began, getting the motor together, parts and such during the 2 last sessions on my truck only to begin building assembling that engine while awaiting decals to dry.
f9a2c8b2b7942f6233f485116da66703.jpg

426c301f633d07acdf3de0db03bc3f01.jpg

ec98a1d8cffd7c02648d36e423fd3277.jpg

69500fe804140abf42d32d8a8aa5488f.jpg

183194c1efbc115c9a0deff5bd8cc36a.jpg

OK, thats the Mopar Small block. I will not say what its gonna be till I know for sure, I have to ask around to make sure of this. BUT it won't matter TILL I do the air cleaner on it, OR the valve covers. I'm not sure if my Dad had used Chrome valve covers, OR left them blue stock! I also don't know what air cleaner it had so, I'm leaving that detail off till I know for sure (I have to talk to my uncle and cousin to find out as they both would know. I simply can't remember. I was to busy at the time working on my own truck so..... BUT, my Dad was always at my uncle's with his truck and doing stuff together on it, as they both were working on their trucks in my uncles garage, as my Dad had his, and oil changes and such regular tune-ups, and the uncle literally building a '70 Chevy C-10 at the time (I remember that truck pretty well, my cousin loved that truck!) BUT I have to talk with him to find all this out BUT I can get the start on it, to the point of "labeling" what the engine is, HECK, I don't even have the valve covers till I know for sure.
Needless to say, thats ALL I got for now, I have to do some talking on the phone before long to get this one under way to know what and where I'm going with it, BUT, thats a start, I can however get the frame going till then as thats going to require some time invested in it to get it to hold the engine anyway, so.......... I'm not 100% stuck on this build, or well till I at least talk to my uncle or cousin on Dad's Dodge back in the day!
More to come as progress is made!
ENJOY!
 
OK for all thats following along, here are those pictures I promised!
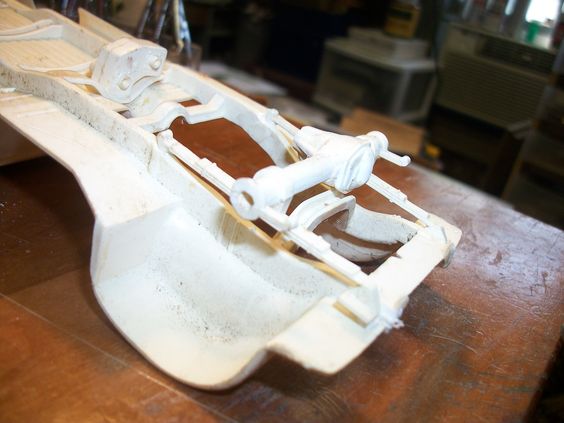
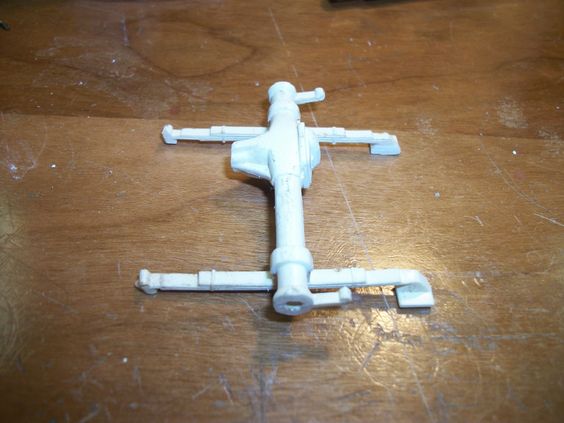
Now as you read with my typed "update", I was removing parts from a glue bomb, frame, to have the needed 4x4 suspension for this truck. WELL that frame so far so good, has supplied me with both front leaf springs, and axle, as well as partial "steering" parts (I'll be doing some custom work), on the steering detail as I did on the frame thats going under my truck in this build.....
ANYWAY, the donor frame for the model was/is gonna be used else where on another build due to it being "styrene" my Dads truck however being bone stock, can use the more difficult frame to work with thats resin for strength sake..... (the styrene frame will have MAJOR modifications to it), for the truck its going to be used in (my Railroad truck) that you'll see again in the future!
So, without further ado, heres that glue bomb frame I was salvaging parts from:
310fa716d42fad89cc281ab0d5c70114.jpg

89cfdf3f7a2c2c4a99559f01874af96a.jpg

95e90df0e9db9d50214d2a1fef208815.jpg

Firstly, if it had been "painted" it would have made severing the parts a bit harder to do, BUT this junk frame looked as tho the whole truck was assembled with no paint! (In my favor!) BUT, wasn't a complete truck when I got it, all I got is what your about to see!
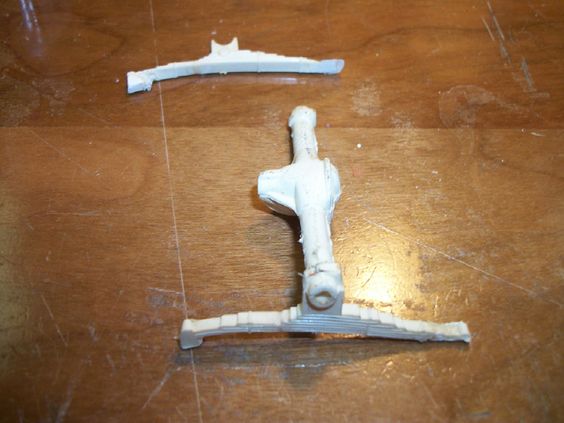
The front suspension isn't in to bad of shape! I can work with it. I did however remove the tie rod, going from side to side, the crank journals to make the wheels "steer" were left in place, I think I can work with them, we'll see. I also noticed A LOT of glue seams needing "filed" smooth, that will be seen in just a few pictures! BUT upon severing this front suspension, one of the leaf springs broke, (I knew it would I noticed the crack looking at the frame at one point so...) I was ready for it, and armed with Tenax 7R!
So, then this is what the parts looked like being removed:
61b0476ffd4f2ed3d0886bef7968424c.jpg

Can't even tell where the leaf spring WAS broken! Anyone see it?
This same frame ALSO donated to me the rear suspension, it however was in much worse shape! REMEMBER this "donor" frame will be extremely hacked up in the end, BUT its going to be used in another extreme build when this Father & Son set are done! The styrene will make the glue joints easier to do, and much stronger, Dads truck however is bone stock, I won't need to do any "lengthening" to it to keep the frame straight or strong so..... The hardest part on this one will be adding the inner fender wells! THOSE will come from a "Little Red Express" truck NEW frame, that would have gone under the truck originally! With a short step-side bed!
a7eb15c7075434587c292b061dfac388.jpg

The back suspension, BOTH leaf springs were broken in 2 places, and the rear wasn't EVER glued really well. AND upon removing the drivers side leaf it came loose from the rear. (NOTHING was glued real well on whom ever assemble this truck when it was now.....
Coming up next, is the "NEW" resin frame! Stay tuned! More to follow these short messages!
 
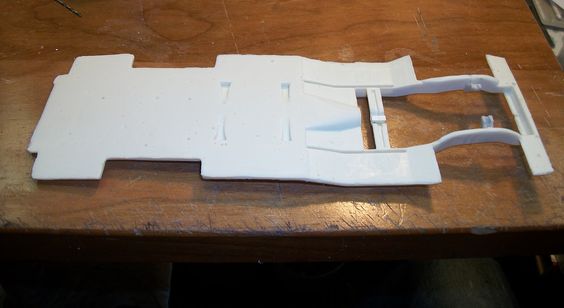
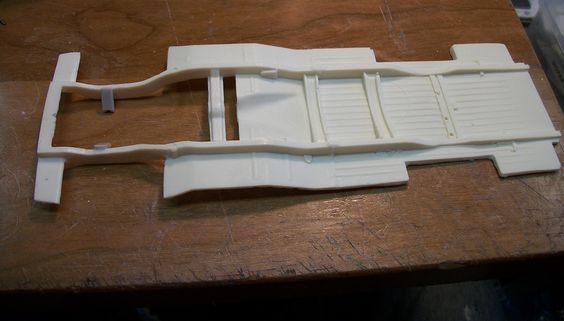
OK, so now you all have seen the "Donor" frame, and the fun I had with it.......... NOW comes that resin frame all that removed, and rebuilt suspension will be going on!
5032e82dcb7143ca4a3e2fe3eb7b575b.jpg

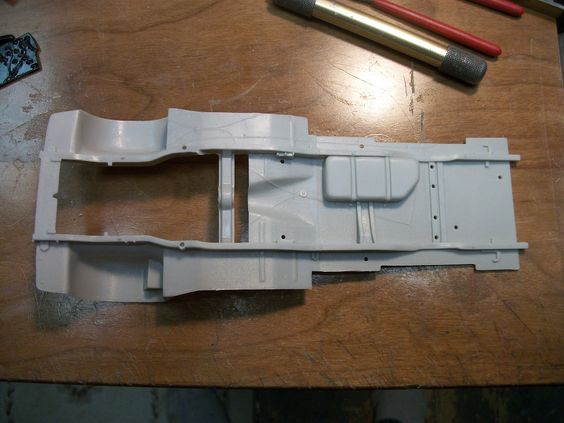
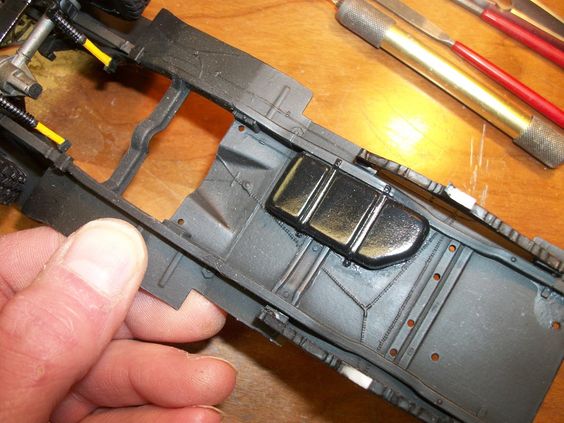
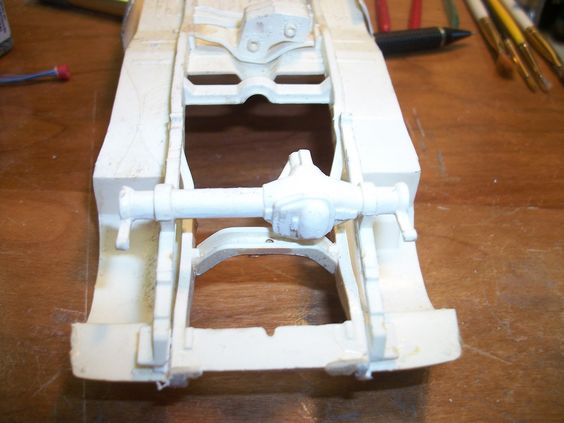
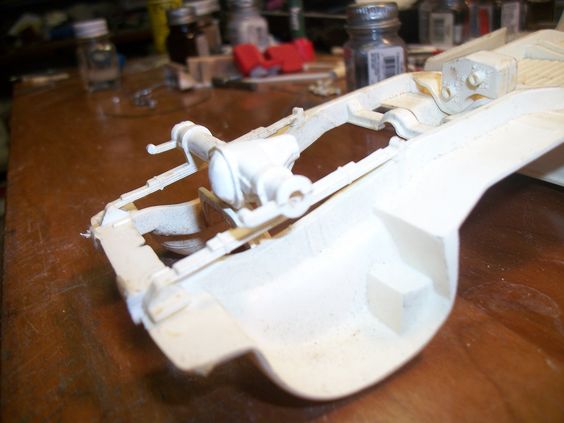
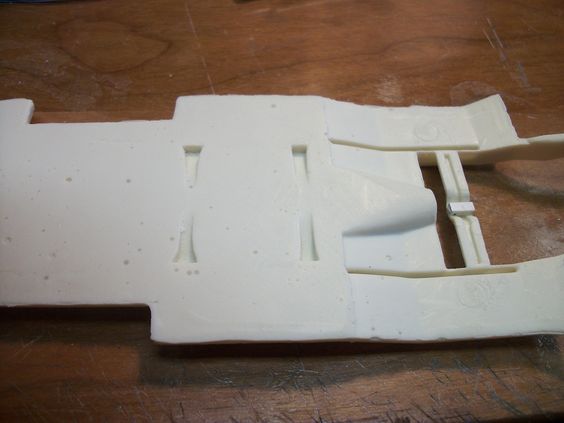
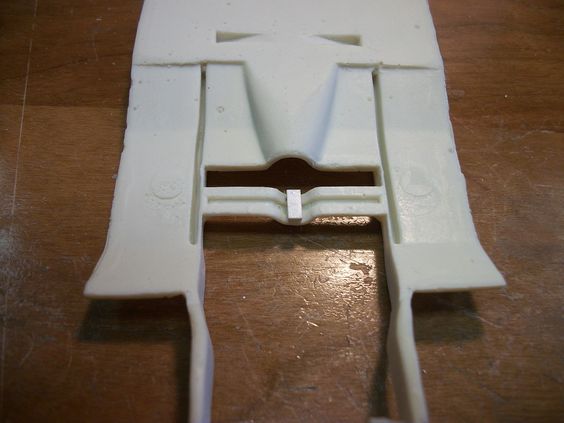
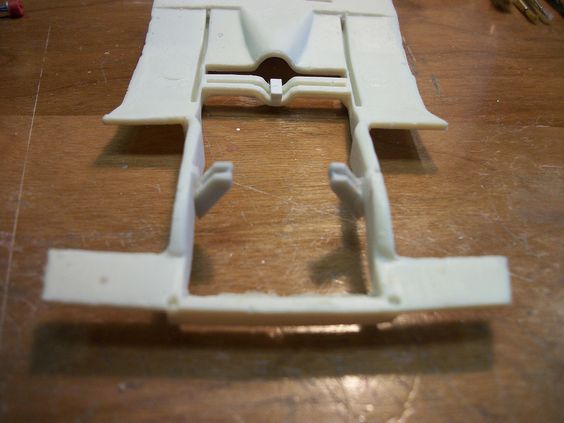
EXACTLY the same frame, BUT its missing a few vital parts, It needs a gas tank, and both inner fender wells. Other then that it looks just like the frame thats in the Little Red Express, only longer! And missing details, this particular frame however, like I have mentioned, is resin! SO, who ever "cast" it, didn't do to bad, but, I need to add inner fenders (I think they removed them, to make molding easier!) BUT, the fuel tank the master copy NEVER had it.... SO, as if I remember correctly that was an added part in the kit (you had to glue it in yourself!)
4d374f794d4f9d09ef908a6f906aadca.jpg

A few resin mold "bubbles"? -YEP, thats one way to tell resin from a glance!
bd17a549e1d5c4109eaaa4b5c5a7efda.jpg

The "engine bay" in the frame, needed "opening" was a fine thin sheen of resin here, like an onion skin, this was made with a 2 part mold! Thats where the 2 separate parts, separated! (say that 3 times fast!) As you can see, I also had to open the little section behind that transmission cross member as well. Along with I had added a "pad" to mount the trans mission too, as the original truck had a half breed 360 - 440 in it, and the transmission was a bit.................bigger in diameter so, I needed something to bring the tail shaft up on the transmission, and I had to get the front mounted as the stock engine mount (just like my other frame in this build, would not work "as-is" so.....
80e393f8735188f8e4b0a09dc1fb17b7.jpg

I have to make 2 completely different engine mounts per truck due to one being/having a Big Block in it "Mopar 440" and then the current one having a small block in it, "Mopar 360" SO, yep its the same way in real life too the mall block engine mounts are a bit longer and a bit more, pushed up, to meet the block, where the big blocks were pushed down to meet the block in about the same manner, just higher on on and lower on the other due to "deck height", the mounts weren't on the same "plane" from the big block to the small block and they compensated this by length and placement of the mounts on the truck frame!
622de5038fcf4f36a365b0b9fd846b64.jpg

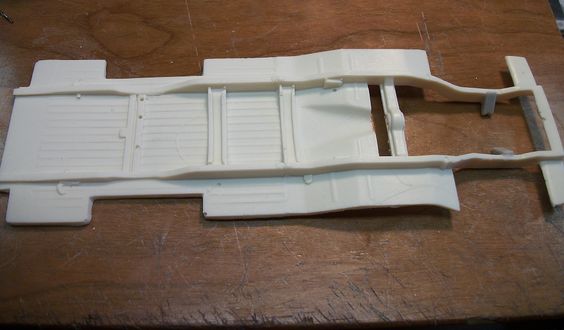
Over-all look of the frame upside-down!
Notice closest to you lowest part of the picture, that frame rail, NO gas tank attached to it!? The truck this was molded from, I am not sure if it came with a glue on detail part, or simply did not have a fuel tank on the frame rails, (IT certainly could have been behind the seat! BUT I'm not 100% certain on that so.... I KNOW where the step-side tanks were however (I've owned several), and got one even today.....
5a7300c3fac02335f5f4d47dfb8b093a.jpg

Just the other side! This picture is the one that would show how the tank would be again the furthermost away frame rail!
A few more to follow, STAY TUNED!
 
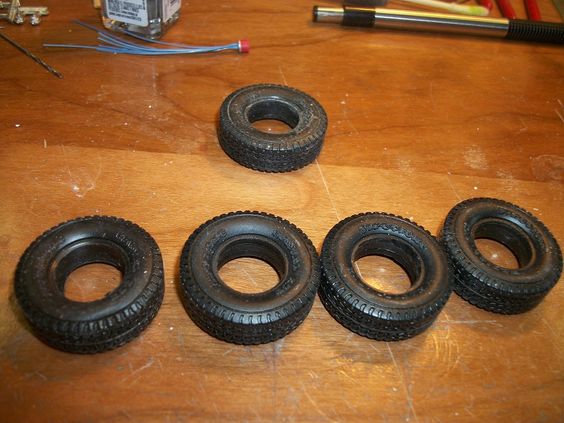
SO..... I got the suspension on the way, I got the frame almost ready for it, and then it comes down to "stance" this was and has got to be a STOCK height truck, thats how my Dad had his THAT I do remember, Problem being, is will it work? I kept as much as I could "stock", BUT could I pull it off with the tires and rims I had? NO, I got a bit more help from yet again Vince! (Thanks man, you have not idea how much hide you been saving!) LOL
He sent me these:
a669a840aec42bb6295d1017840b2075.jpg

These are the best ones for the size I recall and my uncle speaking about over the phone the other night. The "singled out one" is ratty, and will be used NASTY side hidden as a spare tire! -Just to get rid of the thing! Its the only one I have and its plenty good on one side for a spare!
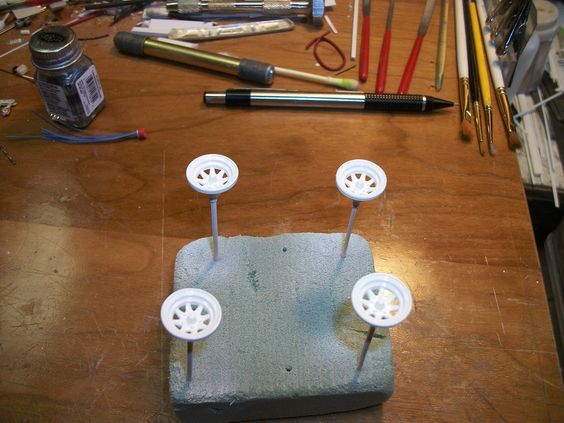
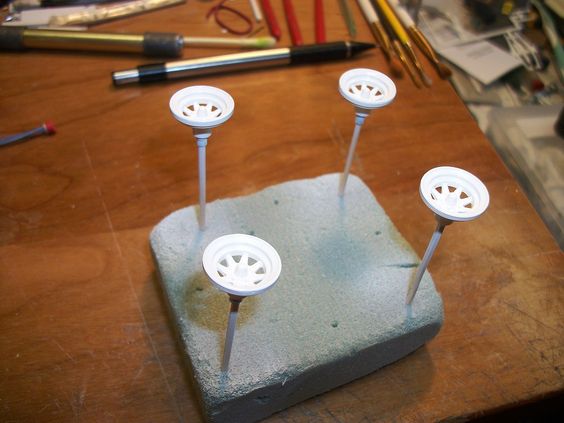
Then, I haven't mentioned rims.....
ae2d79a045039c23ea68acb34344a423.jpg

d0f72a948d0e4bb74244d2ec054190f3.jpg

These rims, well IF my memory serves me right, they seen 3 or maybe even 4 Dodge trucks my Dad owned! WHY he loved them, I could not tell ya, BUT I know he did..... I know at least once he had them sand blasted, and powder coated! Never to need much upkeep after that, they STILL exist today, on the '84 Dodge Power Ram my cousin got that was also one of my Dads trucks! (thats how he got the rims!) My Step-Mother sold the truck to him AFTER Dad passed this past spring. As 8 vehicles is about 5 to many for her! LOL I just wished I was closer, I probably have that truck too I lived closer! BUT they were white, gloss white on a gloss black truck. They had I believe a red and blue stripe in them originally till Dad had them powder coated then those were gone, but.... they still looked pretty good!
THEN, last but not least.....
5667720451a98c39f0c8f239c71453a5.jpg

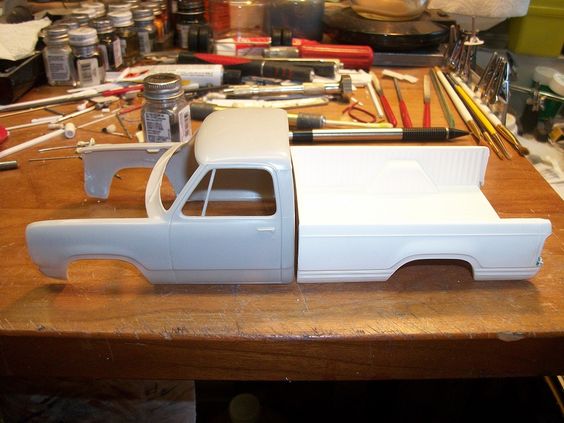
A picture of the cab, and the straight bed..... This is what Dad's looked like..... Imagine it black, 4x4, stock height, white spoke wheels, stock tires, and if I can find something once in awhile a bed cover NOT a "tarp" but like a top over the bed, with whatever you can imagine in the thing he was ALWAYS hauling stuff for himself or others so..... At times seems as tho he stored things for short periods of time too.... In the summer however the bed got cleaned out, and the top was removed, and used to haul but not to "store" for any length of time. -Thats a part, I'm not sure ANYONE makes (at least I haven't seen any)
Thanks for looking and following for those out there following this thread! More to come when I'm able!
ENJOY!
 
Back
Top