• Welcome to For Trucks Only !

    We are a community of American Brand Pickup Truck and SUV owners. Join now! Its Free!

1967 VC DODGE UTE

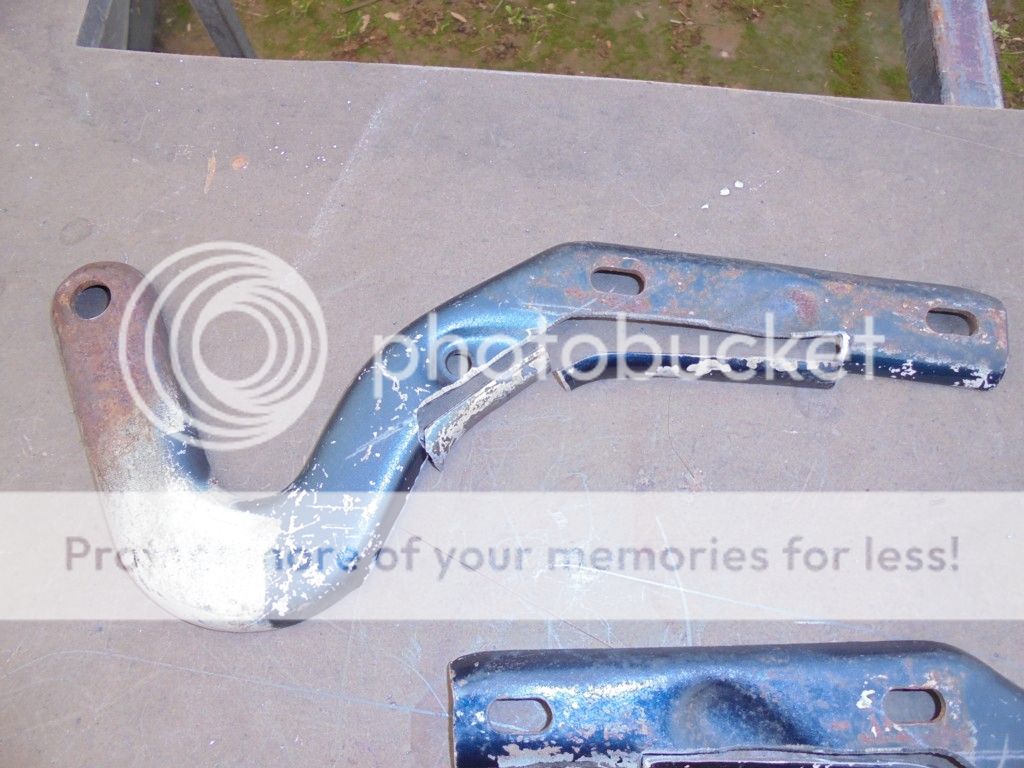
another small job out of the way this last week end.....with removing the factory hood springs it leaves a big ugly section of hinge hanging there for no reason...I bought a pair if hinges off Ebay to modify and swap over once painted...

I cut off the unwanted section and kept the rolled edge sections to weld back on to keep the original profile...


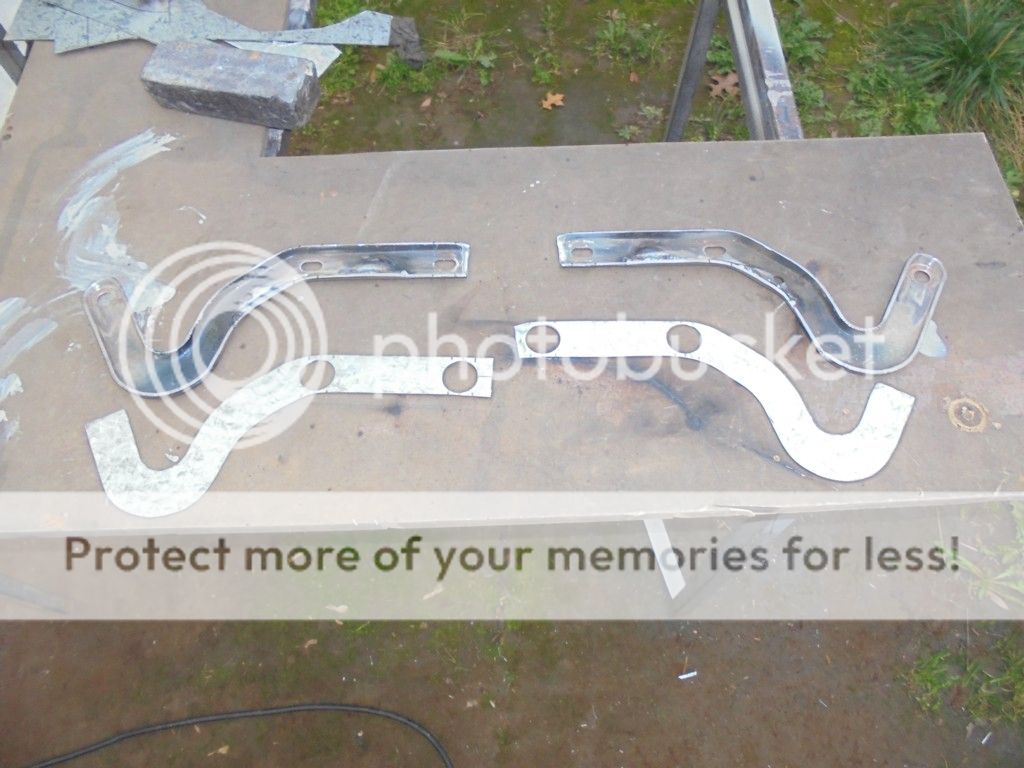
once they were welded into place I cut a pair of cover plates and cut holes for the hood bolts to fit through...


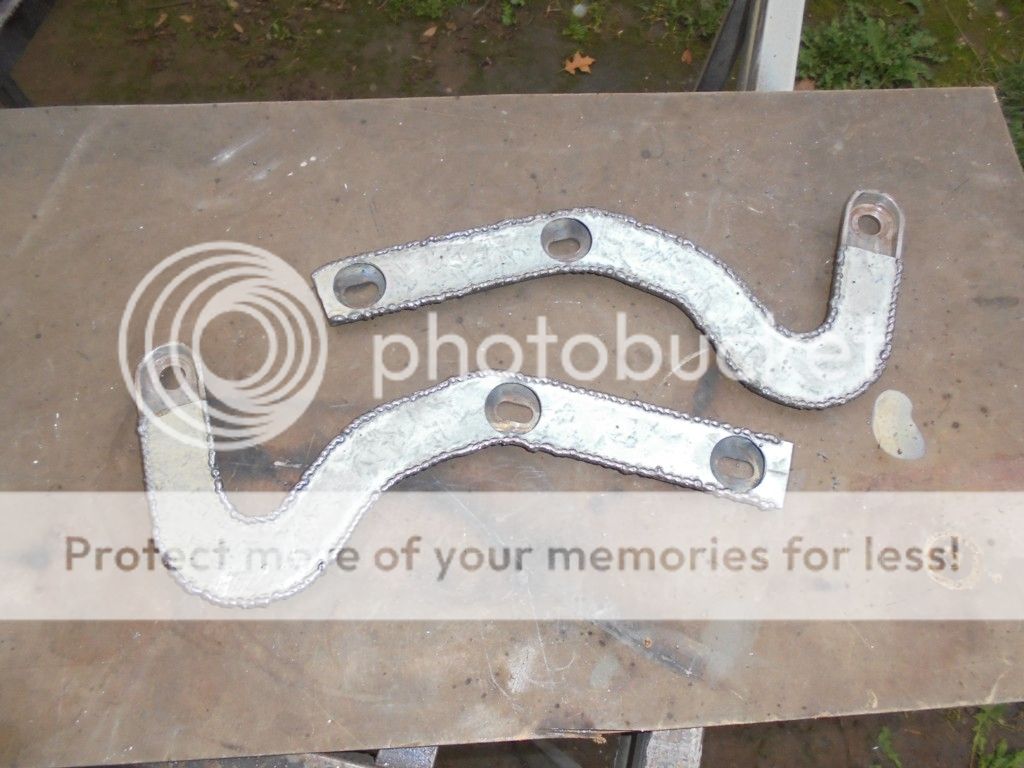
stitch welded ready to be ground smooth...


you can see how much was cut away with the new hinges placed over top of the originals...


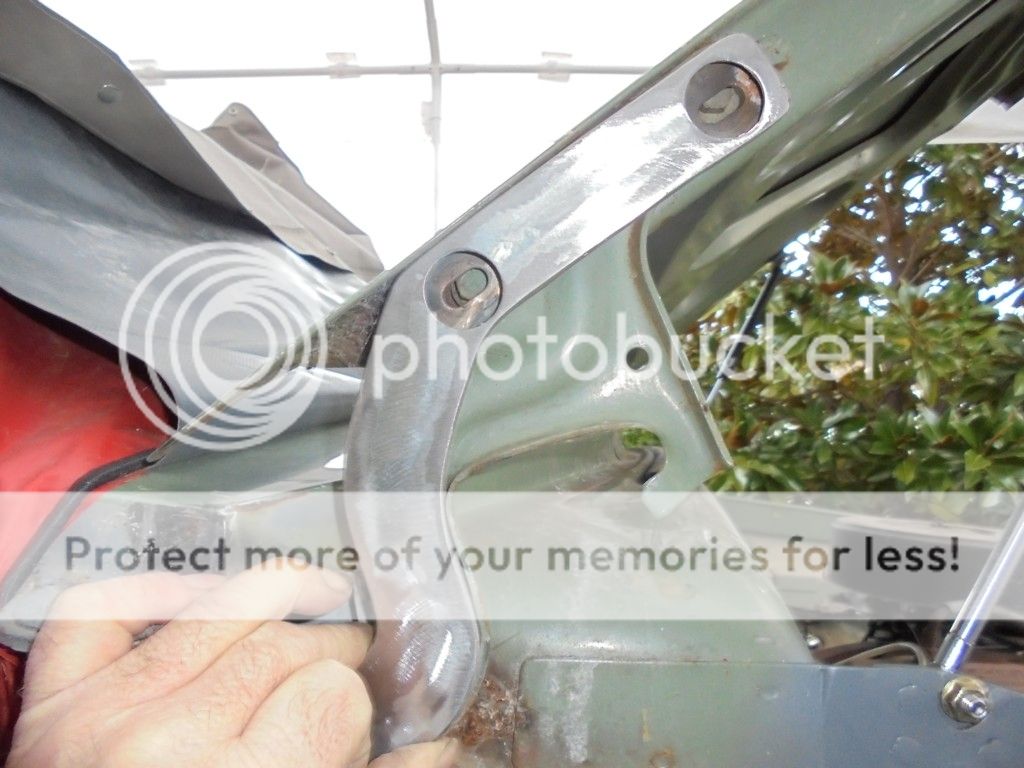
a couple of extra welds and a final grind and they're ready to paint...
 
also been playing with the sound system.....the amps are to be mounted behind the seats on the rear wall....it's going to have a mono block amp for the sub and a 4 channel amp to run the front splits as an active system...that is, each front speaker will have it's own channel so each can be tuned from the head unit, all comp stuff....anyway the amps will have custom made fibreglass bridges between them so it looks like one large amp right across the cabin

in the back ground is the mono block amp....the alloy piece in the middle is one of the end sections I removed to get the shape for my end sections for the bridges...the pine blocks are the 4 ends that form the bridge ends


the pine forms have been mounted to a frame and foam blocks will be sanded to shape to fibreglass over


sanded to final shape ready to glass


2 layers of 450 gsm glass


as the rear wall hasn't been welded into the cabin I had the chance to mount it together on the bench....testing the lighting effects, they like that sort of shit in audio comps!!


doing a test fit in place as the bridges will need a bit of a bog up to fit exactly ready to be covered in black vinyl to match in with the colour of the amps...the lights will be able to be switched off for normal use...they're just for extra points in the comps

 
Wow, that's some awesome work your doing. Can't wait to see it all done.
 
Really incredible job!!! And you're doing a great job of documenting it, too. Please do the Mopar world a favor, and contact Mopar Action magazine when you finish this. Your build story would make a great article for them, and they frequently run stories on Mopars from outside the USA, including many from your homeland. Really outstanding work!!
 
That's one of the coolest rides I've ever seen and your work is incredible. Serious tip of the hat.
 
Some great looking fabrication you're doing there Marty. Well done and welcome to FTO. :)
 
docdodge said:
Dude, ya blew me away!!! NO.... wait, unless you are restoring old iron your skills are wasted!! what you did and are doing is on par or better then the guys in the states that have all the latest tools!! Man... Im speechless!! Any idea how much to ship my projects to you?? Man o man what a job!!!
^^^
This !!!,Truly Astounding Fabrication Work.
 
thank you all for the kind words....

one of the first things I did when I got the ute home was ditch the drum brakes and single curcuit master cylinder


I used brakes from the last of the Aussie Valiants, the 1981 CM.....


fully rebuilt with all new seals piston etc, new slotted rotors...the diff was redrilled to match the late Ford stud pattern of the CM...


I also fitted an aftermarket booster and twin curcuit master cylinder mounted on a V8 offset mount...


at the same time I rebuilt all the suspension and fitted the rebuilt steering from my mates 62 Valiant....it had been rebuilt about 5,000 miles ago and was only removed to fit a rack and pinion....it will be removed from the Dodge when the V8 goes in as a rack and pinion will be going in that as well!!
 
Your fabrication skills are off the charts! Car is cool too and would have been great if those made it to the US.
 
We are so lucky being able to buy that new Valiant stuff still. My friend just sold his Valiant a couple of weeks ago....sad to see this one go, it was a real smart car.

DSC02345.JPG
DSC02342.JPG
 
Is there anything that you aren't going to touch on the car? Very impressive skills you have.
 
thank you all for the kind words....

one of the first things I did when I got the ute home was ditch the drum brakes and single curcuit master cylinder


I used brakes from the last of the Aussie Valiants, the 1981 CM.....


fully rebuilt with all new seals piston etc, new slotted rotors...the diff was redrilled to match the late Ford stud pattern of the CM...


I also fitted an aftermarket booster and twin curcuit master cylinder mounted on a V8 offset mount...


at the same time I rebuilt all the suspension and fitted the rebuilt steering from my mates 62 Valiant....it had been rebuilt about 5,000 miles ago and was only removed to fit a rack and pinion....it will be removed from the Dodge when the V8 goes in as a rack and pinion will be going in that as well!!


I didn't want to be the first to say it but thought I should point out that you installed your brake MC on the wrong side ;)
 
Some very nice work, both in sheet metal and especially the interior.
 
another part getting close to completion is the duel battery mount....one battery is for all standard functions while the other seperated by a VSR (voltage sensitive relay) is for the audio system....this is to be mounted in the rear storage compartment...

this is the frame that will bolt to the floor, the fixed nuts are for the clamps...

1_zpsg1f6p7bb.jpg


1 1/4" straps clamp each battery in place...

2_zps6fh5mhls.jpg


3_zpshmlebihr.jpg


part of the floor had to be cut away to fit the mount...

4_zpst8m6eob0.jpg


8_zpsocaf2hbt.jpg


the frame upside down with the new floor section bolted to it while it's taked in place, has a built in vent for the battery gases....rego requirement

6_zps38uakeoz.jpg


ready to fit...

7_zps8vgfntsa.jpg


welding done....now to make the caseing

9_zpsbx39khfd.jpg


first mock up of the case....still has to have the lid made!!

10_zpsztzpncrw.jpg


a VSR works by disconecting the 2 batteries from each other when the key is off....the second battery can then run accessories without affecting the starting battery....once the vechile is started, the starting battery only is charged to a preset voltage then the VSR connects the second battery and then charges both to full charge....the system will also have a battery minder fitted....they are a charger that works from the house and charges both batteries to around 14 volts then drops back to 12.7 and holds that voltage....designed for cars that aren't started every day....the wifes car had the starting battery replace after 7 years while the aviation grade batteries for the audio system are still going after 10 years!!
 
well it is Aussie after-all right? I actually was expecting to see a Mopar 245 Hemi in the thing...... NOT a Slant 6! Looks to be a 225 at that! I got a close friend thats got a '66 UTE in Tasmania..... So, I know a little on them!
 
well I'm now 12 days into making the hard cover....plug made and the mould from that for the front half of the cover

17_zpsgzf4c3w5.jpg


both the gel coat and resin are measured on kitchen scales to calculate the 2% catalist mix...

18_zpsnl6gz6xv.jpg


mould made ready to trim...

19_zpspxt6apgu.jpg


mould getting the reinforcement frame fitted...

20_zpsjsa2huwy.jpg


making the plug to make the mould for the rear half...

21_zpstijaddtt.jpg


plug finished ready to make the mould....

23_zps3rdwbvgk.jpg


made the reinforcement frame today ready to fit when I make the mould next weekend....by the time the finished product is made I'll be 17 full days into it plus a couple of day for the frame!! not a small job!!
 
Last edited:
Back
Top