• Welcome to For Trucks Only !

    We are a community of American Brand Pickup Truck and SUV owners. Join now! Its Free!

1979 Dodge Ramcharger 150 My Grandfathers LAST SUV/Truck.

67 Power Wagon

Well-Known Member
Joined
Oct 5, 2015
Messages
743
Reaction score
384
Location
Hell,NH
Guys,
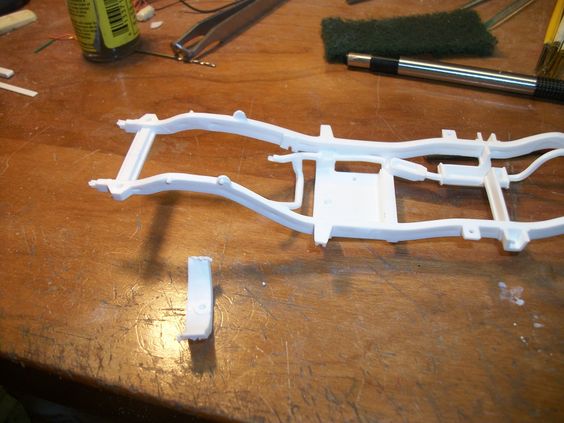
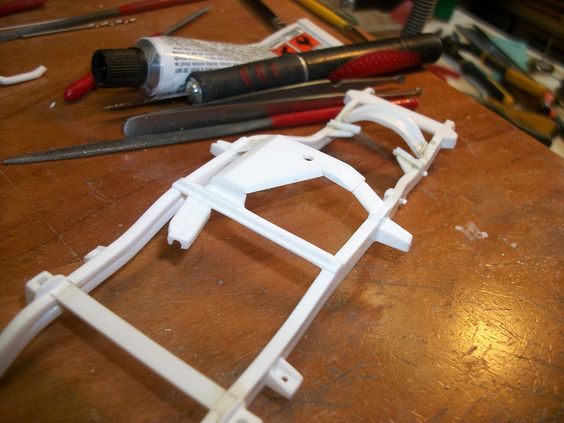
I been thinkin' I have 2 of these Ramchargers from the "Gone Fishing" set from Revell, WELL its about time I dig one of 2 out and get to making it... my Family Members vehicles come first if I have more then one, SO, without going into a long winded message, I got to thinkin' of riding in Paps Ramcharger last night, and dug the thing out (I haven't done ANYTHING to it since I got it, BUT pulling parts for the engine, and removing the factory parts that the engine had within the kit, is a start....
Now a little history, I rode in this truck, quite a bit when I was younger! He had this truck up to I THINK it was 1994, or 1995, He had it, with a car, a '76 Chevy Caprice Classic. He didn't have the Chevy that long, Bought the truck new off the show room floor in '79! Was his LAST "new" car he ever bought! The Chevy, however was the replacement to the old '71 Dodge Demon he had before it, My Dad I believe was the felon who "wrecked" the '71 Demon..... GRRRR Was using/borrowing it when his car was broke down and had to go to work in bad weather, slide off the road and totaled the car..... :(
ANYWAY, back to the Ramcharger, I began by thinkin' of the talks with family members a cousin, and one uncle (I recently lost the uncle) but our last talks was about a LOT of family vehicles.... This Ramcharger came up, It had a Big Block in it, Both my Uncle, and my Cousin seem to think it was a 400 B block. The cousin, worked on it in its last time in the family (I'm unsure of where it is now) -They sold it, when Pap passed away a few months later. BUT my Cousin, another grandchild of Paps was the last to change the oil in it, and do routine maintenance for Pap, SO talking with him, he said the Ramcharger had a 400 in it.... Granted, this "400" would have been a special order for that truck, and he told me that Pap did in deed special order the thing, so.... I have to believe this!
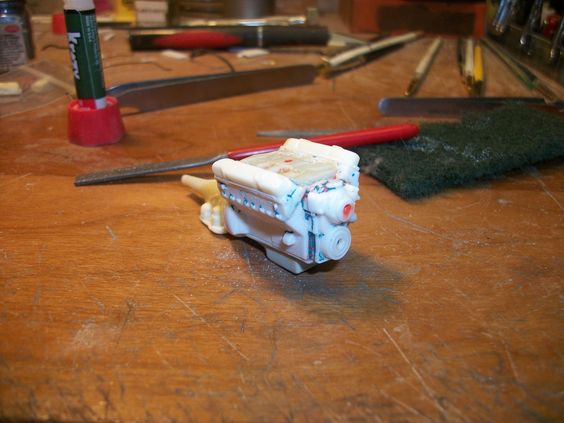
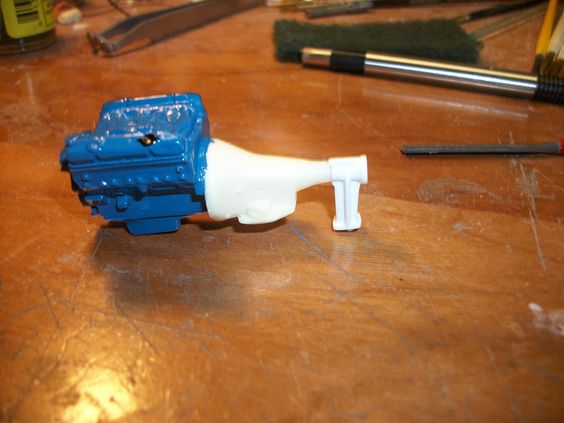
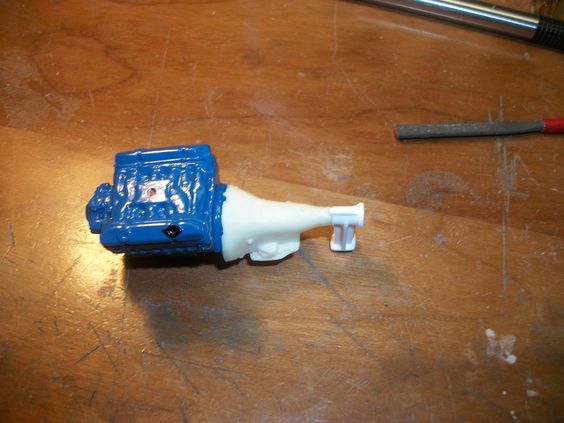
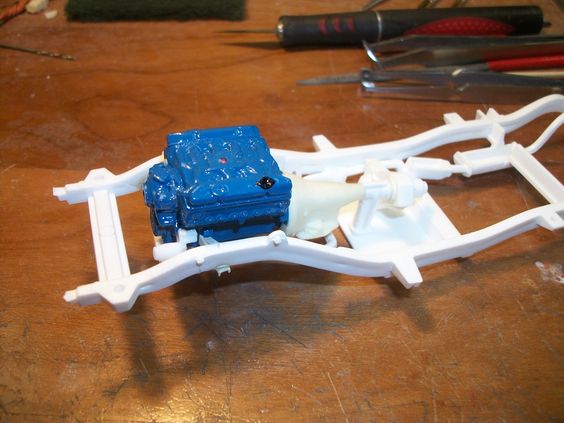
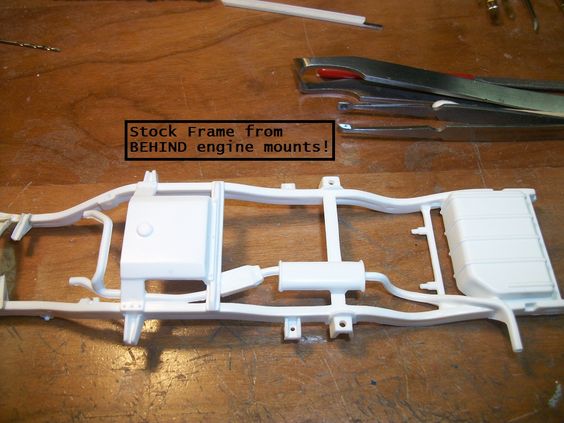
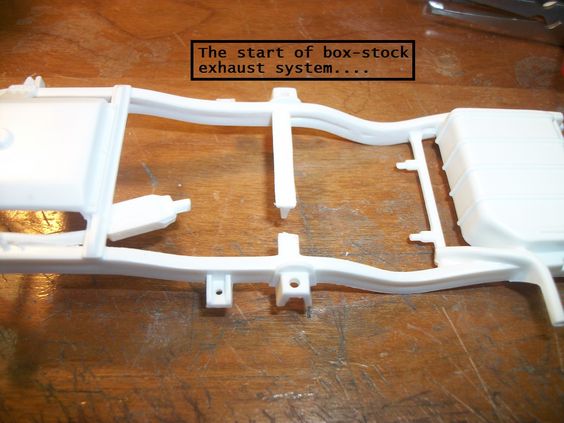
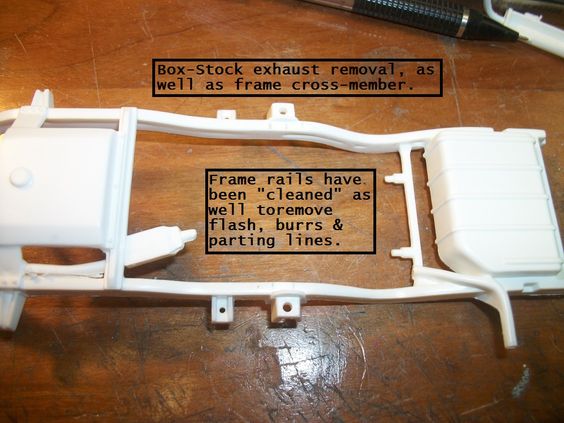
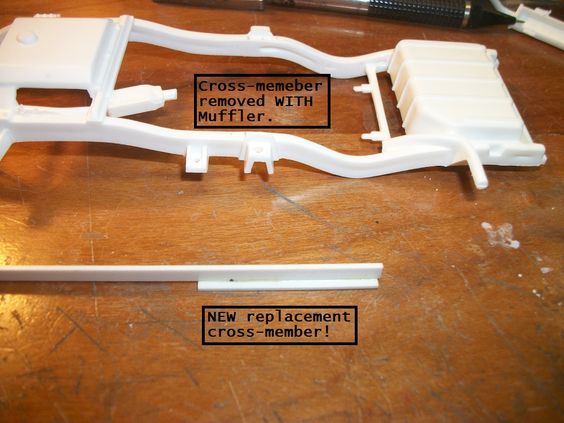
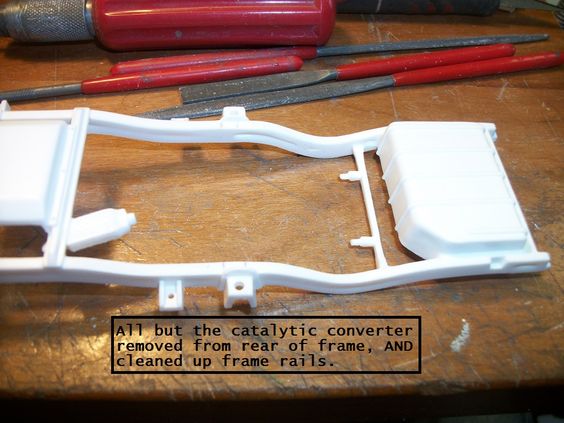
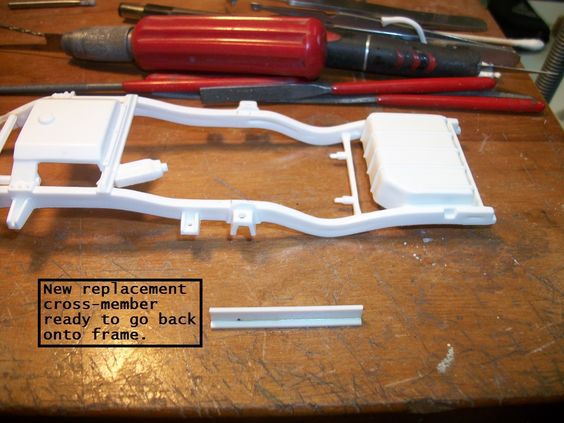
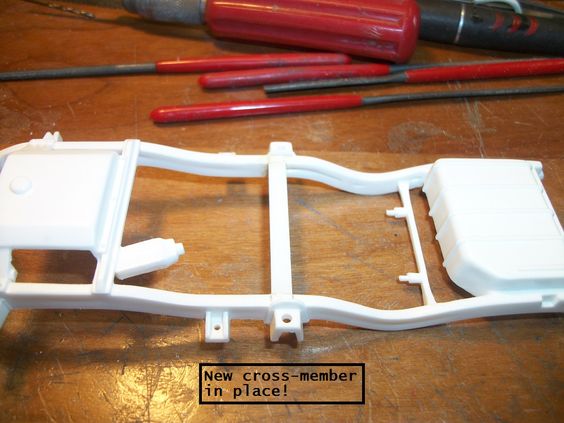
So, now to the model, It comes with a VERY needy engine, the heads and valve covers as well as intake look GREAT, the block? WOW... not even close, I THINK Revell was trying to make it look like a Mopar LA 318..... Just because that was the most common engine for these. BUT the oil filter isn't positioned right, NOR is the oil pan correct for a Mopar LA 318. SO, I pulled these out of the kit, and stashed them in my spare parts bins! (The valve covers? They're REAL close & nicely shaped for a Mopar LA small block!) I may end up molding these as well as the heads when I'm making molds again!
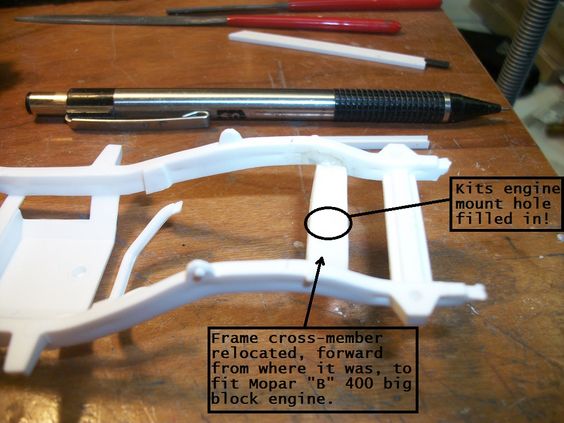
SO, I got to looking at my parts supply for something big block, to be that "400".... I have all sorts of NEW Mopar Big Blocks, but I also have a TON of old, glue bomb blocks too, that are in good shape and usable. So I thought why not use up some of my glue bombs to lesson the amount I have.... Save the new blocks for ones that need that NEW feel to them! -Plus, thats using a model part that needs a little, but will look GREAT!
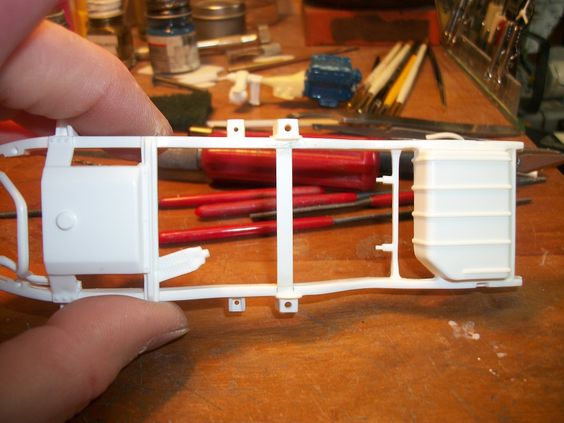
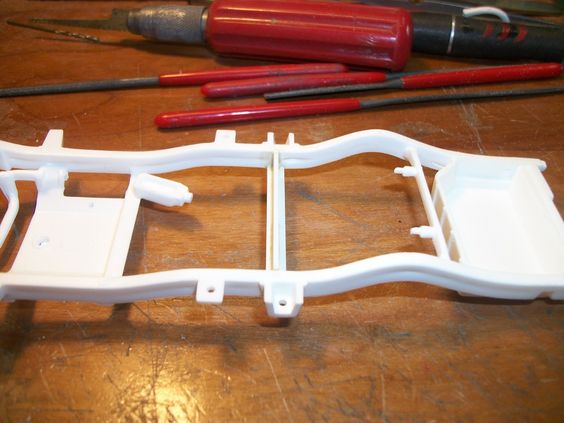
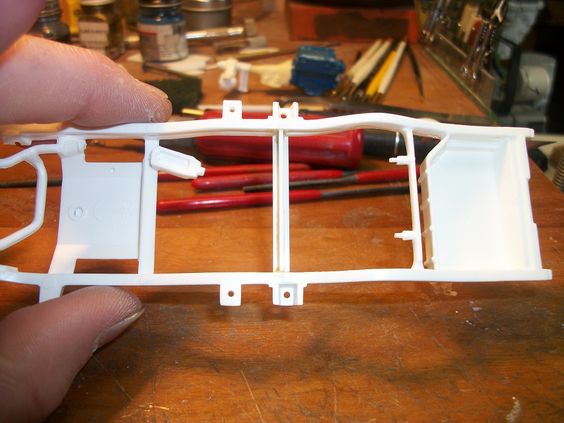
So, off to pics of this huh?
02c6cbaba6e937ee676203f6fb6c58a9.jpg

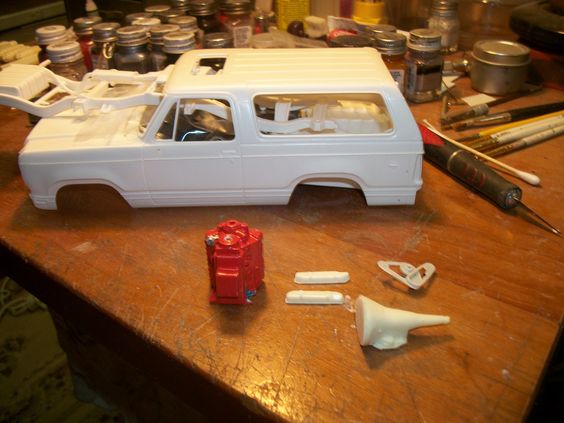
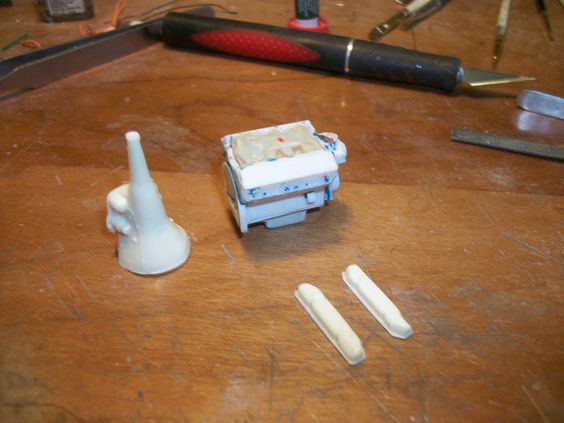
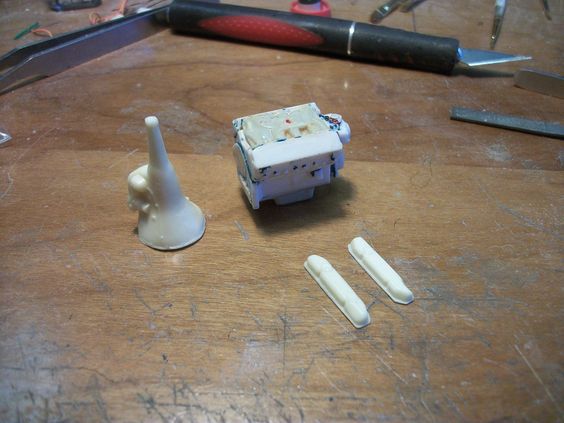
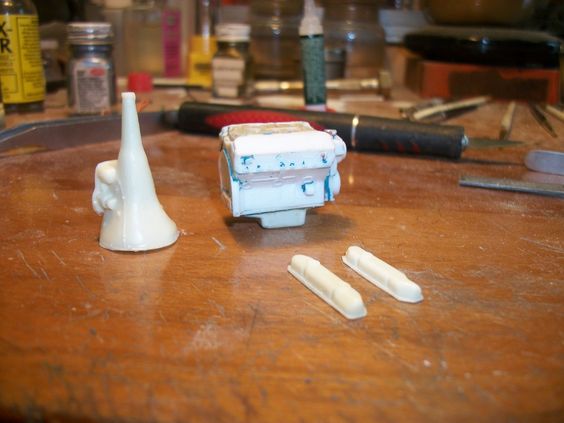
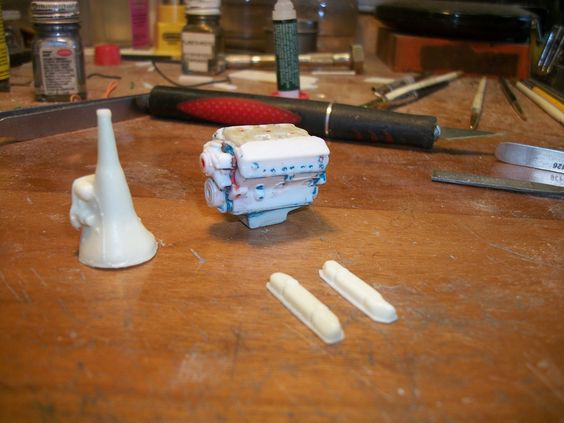
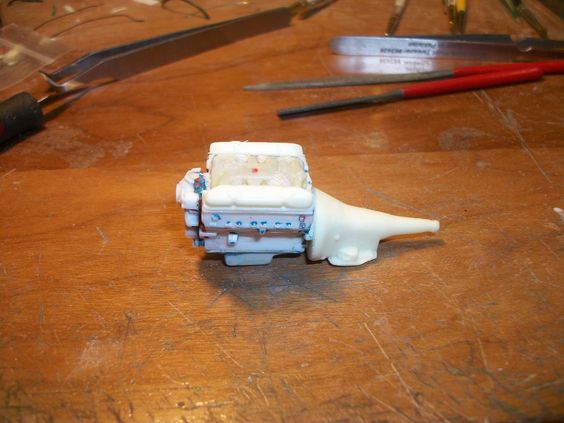
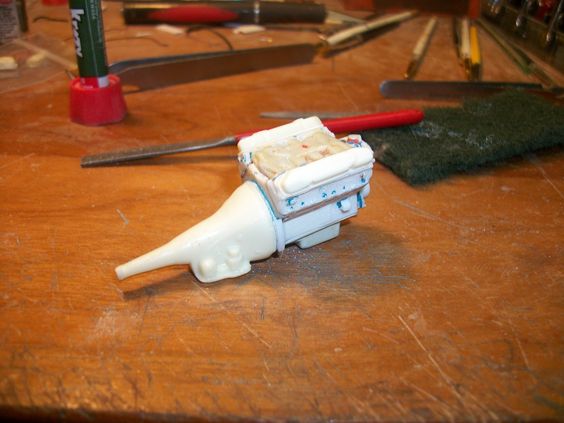
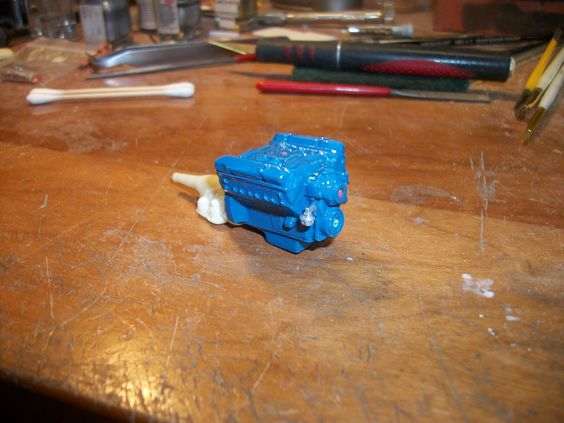
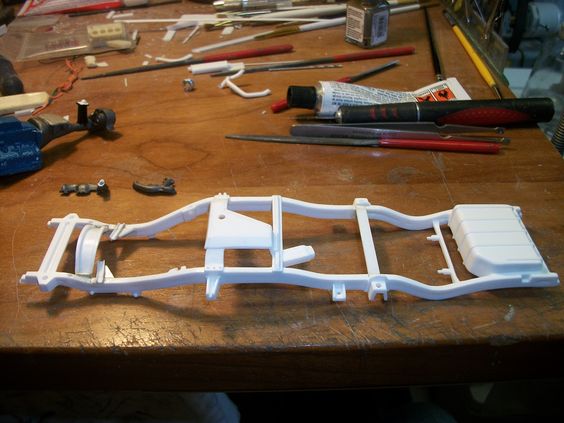
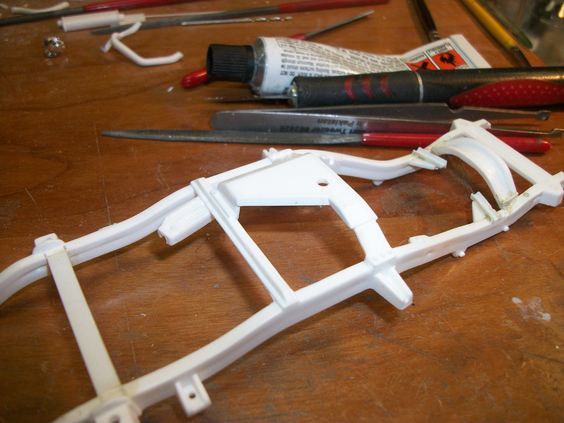
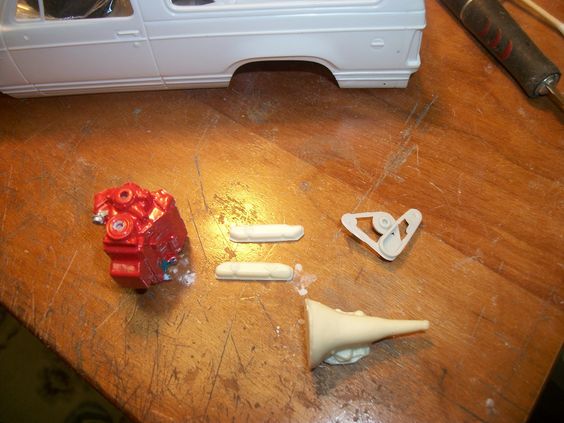
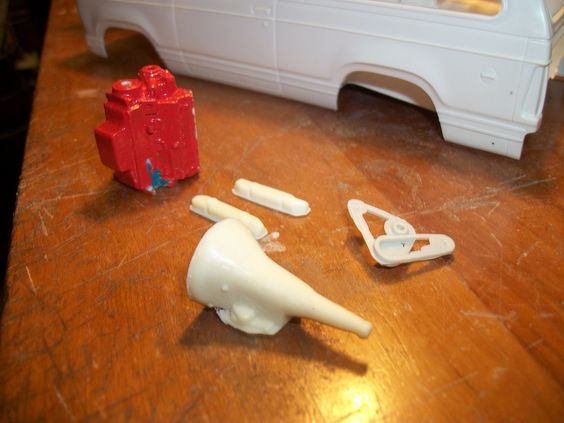
Setting in the foreground is the Ramcharger itself! In front of it sets a Mopar High-Performance Orange 440 block from a Revell Dart! ITs NOT gonna be a 440! LOL I'm gonna use it for a 400 B block! With it, you'll find that I have my OWN resin valve covers to go with the block! I took the Revell factory valve covers off the engine and stashed them with my spare parts for another build! They just don't match the contours of a 440 or ANY "true" Mopar big Block, BUT would be NICE "aftermarket" valve covers, if chromed with Alclad! SO, I stashed 'em to replace them with my own castings that are from AMT-Ertl. They made the closest Mopar Big Block "Wedge" valve covers as far as they're shape and contours go.... Which was the master copy for my resin versions.... Only difference with my resin copies is I thinned out the bolt lip of the valve cover to be closer to scale with the real thing.
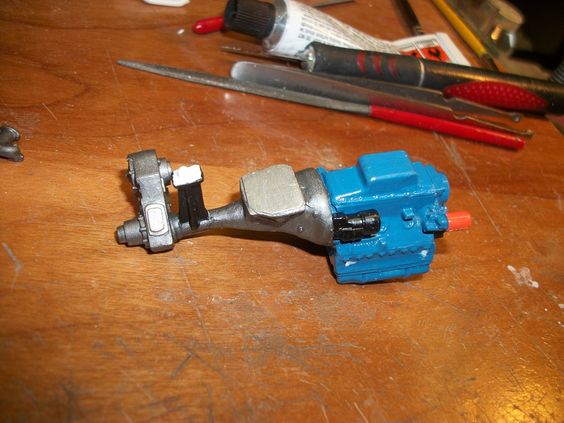
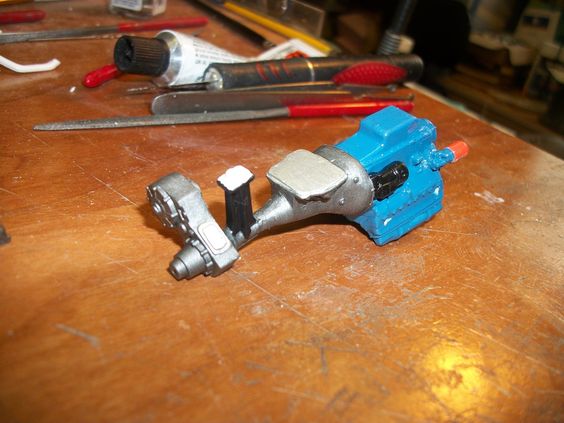
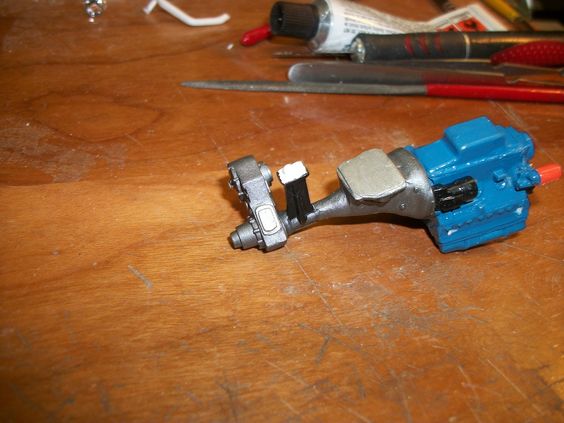
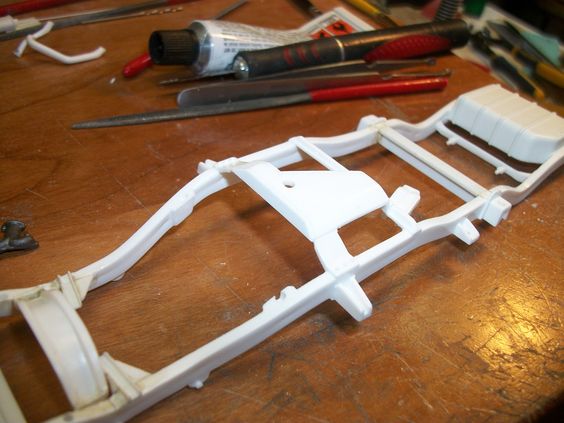
Then, you'll see the pulley set up...... the kit stock parts only provide an alternator, and no power steering, Reason, I went this route is Paps HAD power steering, My cousin told me that was one of the most difficult repairs he done for Pap, he blew a power steering hose fitting, , and had to replace not only that, but the whole line from the pump to the gearbox on the frame! Said with the 400 there wasn't a lot of space to do so! SO, I pulled a spare I had, from one of my "Dream Truck" build.... Thought, why not? It was left over (I used better looking detail pulleys on that truck so left its half-hearted pulley set to use else where, AND I know a way to make it look better then it does box-stock.
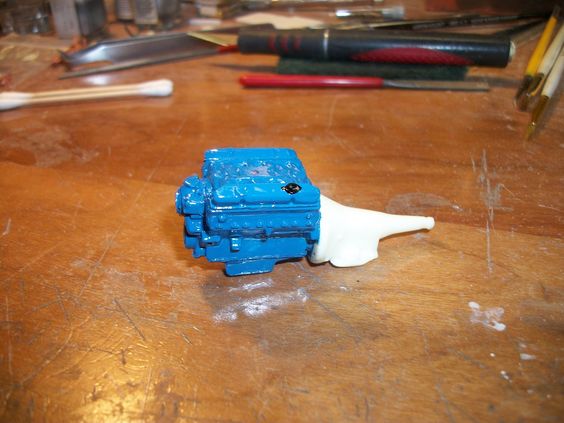
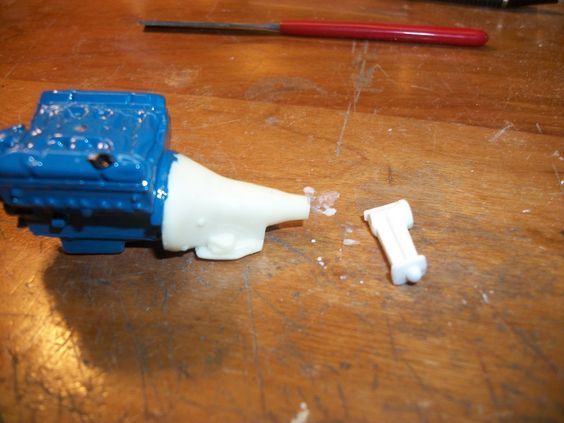
Then you see the transmission, a 727 Torque-flite Automatic. My Resin cast part as well, as the kit part supplied engine and transmission was a standard, with married transfer case. I'll be removing the transmission tail to put onto my resin transmission, due to the way it mounts..... A bit of work, but by now you all know how I am.... details, Details D-E-T-A-I-L-S!!!!
02a5991db072e450e79012395e6e2990.jpg

9ad6fd311ac0d5e95f27b71715d1958b.jpg

6a4494201e73ccdd079df3b98181750c.jpg

aed9f24361222bb633434f69813a2e65.jpg

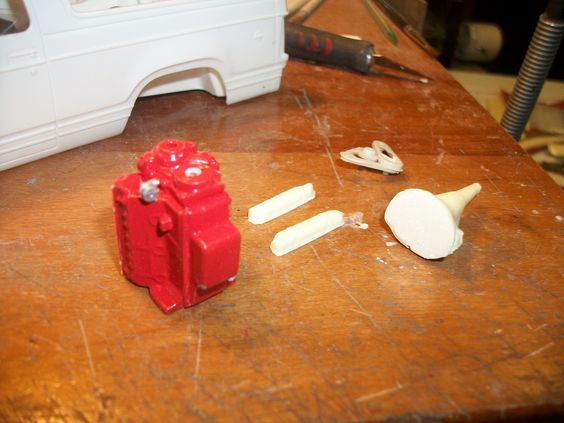
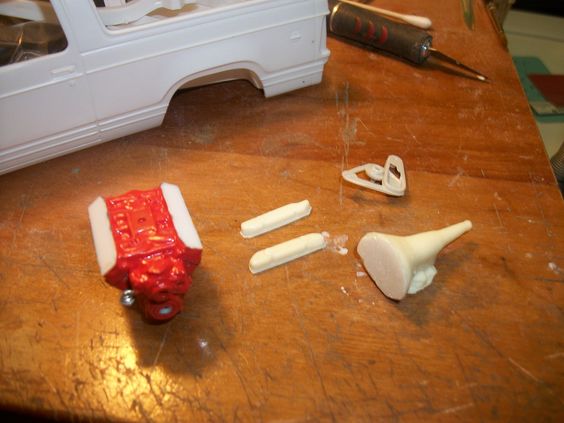
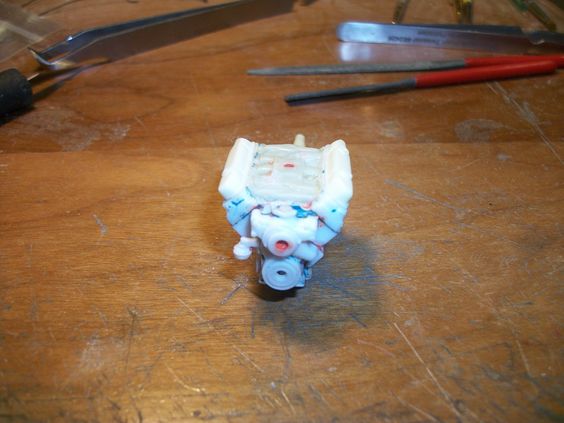
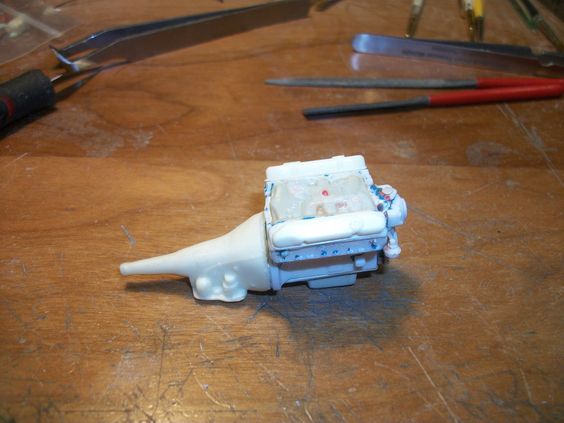
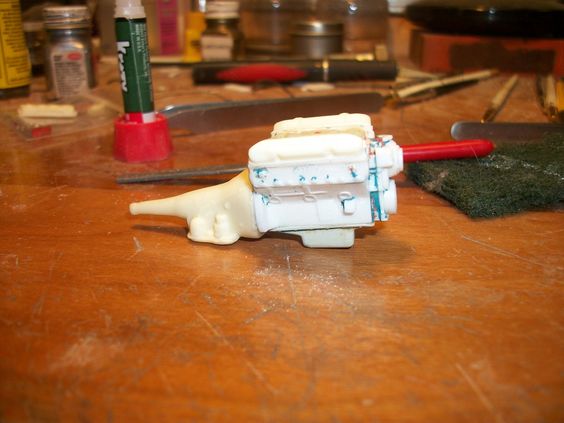
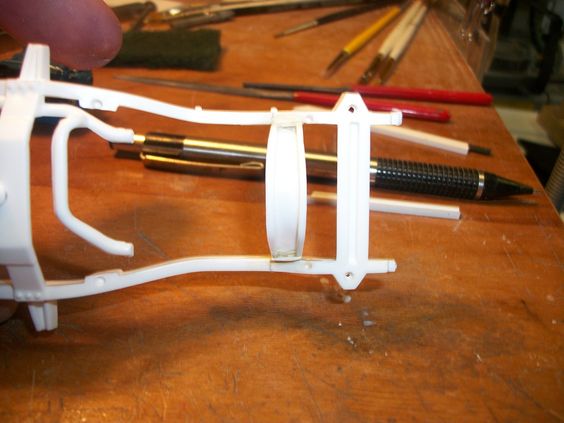
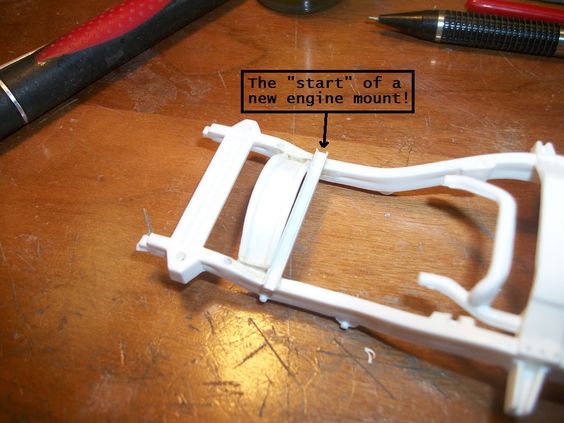
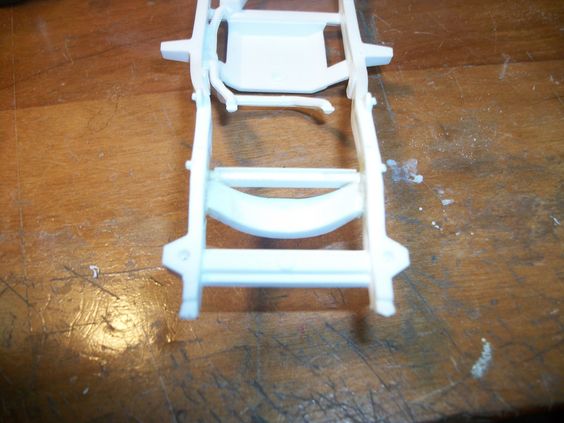
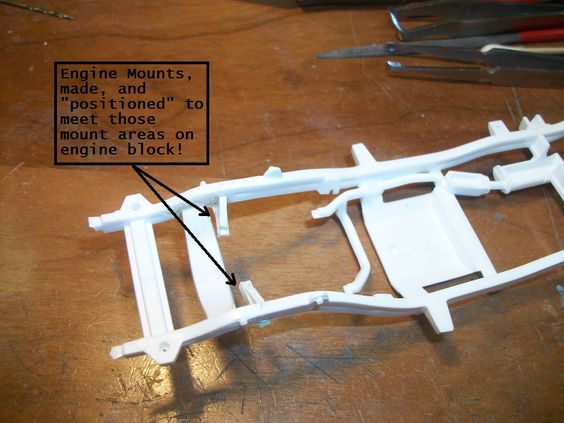
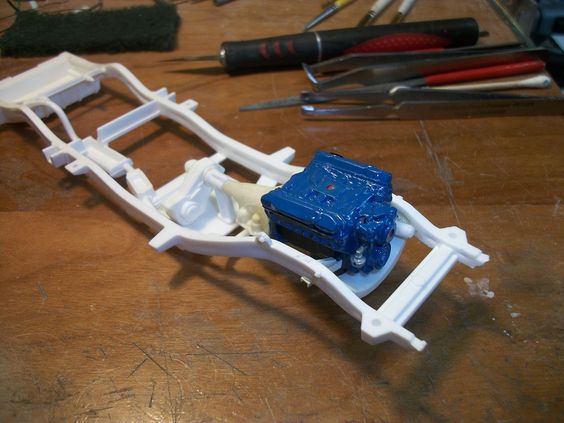
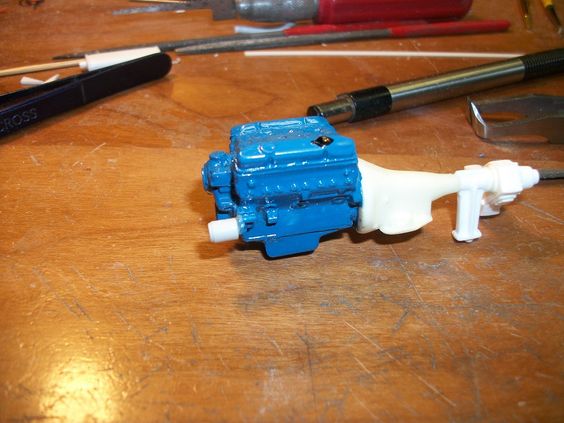
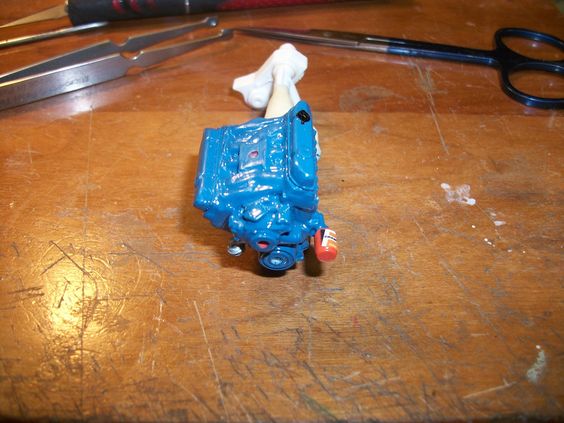
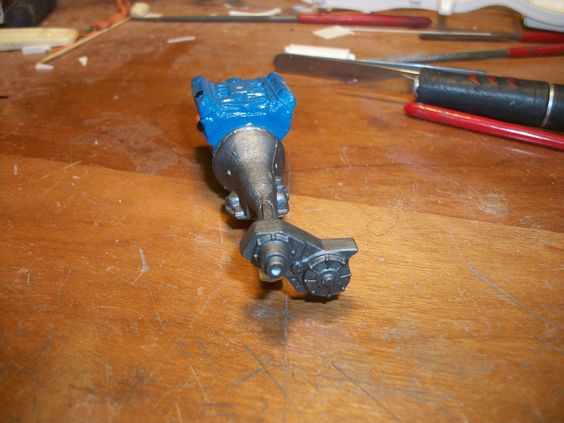
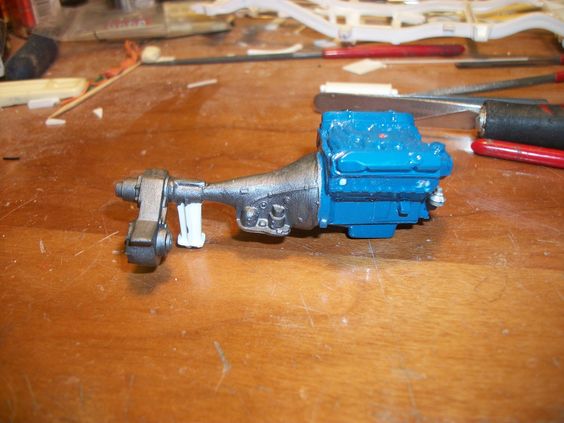
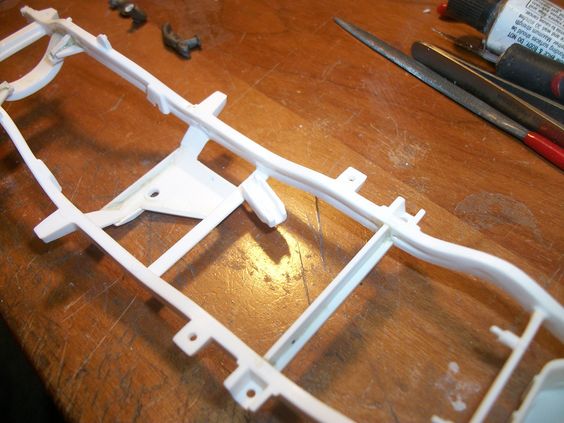
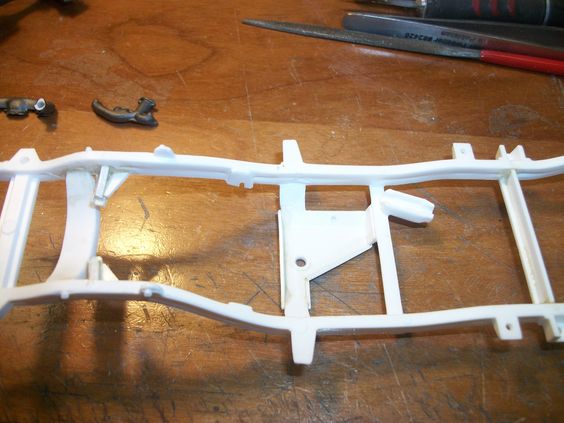
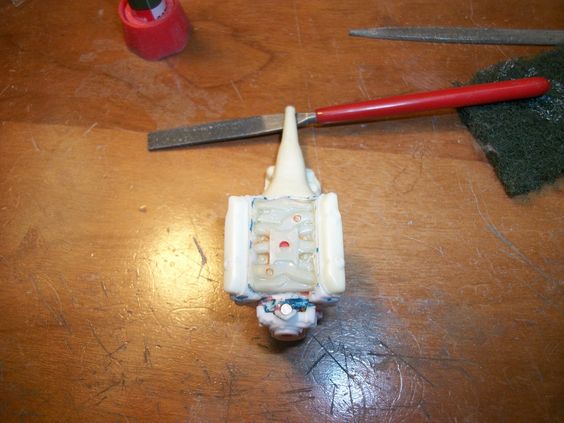
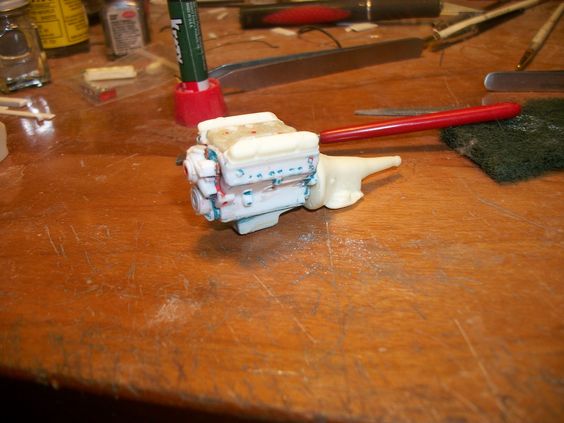
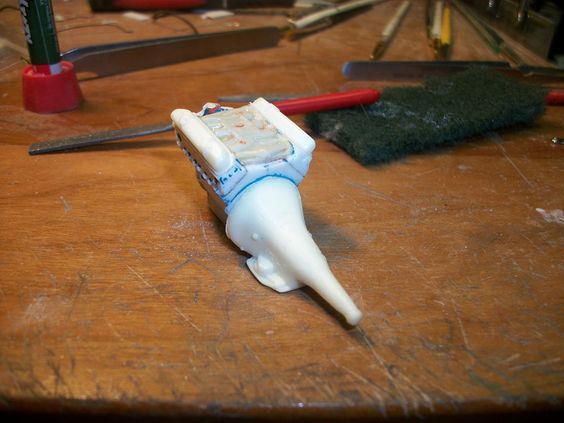
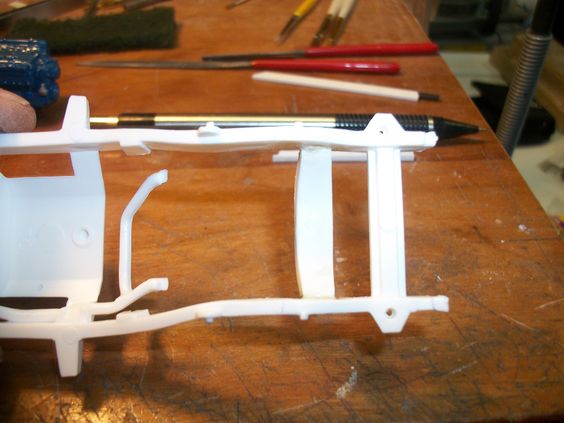
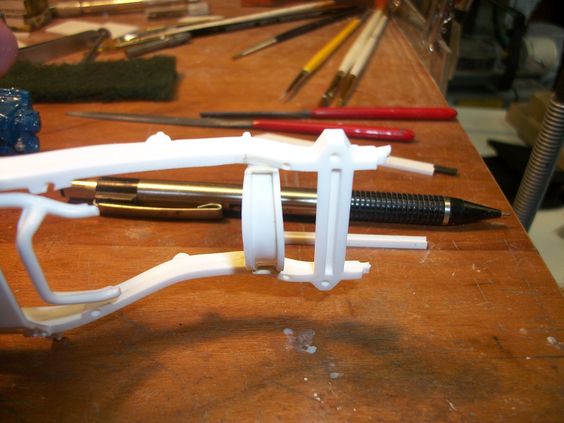
A few close-ups..... NOW as you see what I'm starting with, watch me transform it all to what you see in my other builds..... WITH the use of junk parts, and my own resin parts, to make a refection of a real auto (once again) as you sit and look.....
I'm gonna have a blast withthis one, just like I have all the rest! ENJOY!
 
Well after the first pics taken of the choice of parts, to make that Mopar "B" 400, big block, I put it in the paint stripper
for about 3 hours, and this is how it came out.....
4658cf13fd8fad2f0eeb426c6d77c094.jpg

6c90d27ee88d6c1b0171bbfd0b78fbe3.jpg

787f0e98af28dca07f1faf50ad637e45.jpg

833abe06b773d2bdf86b08aa1b05e8dd.jpg

Well for the fact the motor block was a glue bomb save, and made by "Revell" I think that it turned out pretty good! Turns out, that orange paint wasn't the only color on the engine!!!! It was some sort of bluish/green "turquoise" if ya will. I'm NOT sure what type paint any of it was, but it seemed to come off fairly well in "ELO"! -I was pleased with the result! I had to use a tooth pick and a T-pin in some area's (in the deeper crevices, and in compound surfaces), to get the globs off, but it came out fairly well....
I say it aside, and left it air dry, as the back of the engine where the transmission is to mount, had a "hole" that needed to dry out BEFORE I began to assemble it..... Looking back onto the engine model, it seems there was some "extra" non-Revell parts used! The oil pan, looks to be a medium sump pan, which isn't to the Revell 440 4 barrel (which is what the engine is based off of) BUT looks to be a oil pan from AMT, off of a AMT-Ertl 440 OR the AMT-Ertl 426 Hemi, (not sure which) As I had made a mold of this, so it is one or the other, NOT added by me I might add! The reast of the engine looks right for the block, heads and the valve covers (I removed the valve covers) as I wasn't pleased with the look that Revell gave them to be more of an Aftermarket 440 valve cover then a "Stock" set, SO, I used my own castings in resin to look more to the B 400 engine. My Mopar big Block B/RB valve covers are dead-replica's! They're made from a AMT-Ertl set, with a change made to the bolt flange where they bolt onto the head, I made that "lip" thinner, to look more like a lip then a heighten part!
The Intake, isn't to the engine either, it WAS "Chrome" Revell didn't Chrome the intake that I know of to the 440 that I believe went to the '68 Dodge Dart kit. SO, I wound up having to give it a bath in oven cleaner to remove the chrome from the intake, and that helped remove even more of the paint globs in the heavier areas and crevices.
Stay tuned!, Will be back right after these short messages!!!!
 
As to start again, as you all know, I stripped the engine down found a few interesting parts on it, left them alone They look pretty good,
SO, being happy with the results thus far, I began to assemble the ole 400 B block to have it ready for some color!
26d4c7c783ff35c5e49a48e287729980.jpg

4e0d9741daf5b3fecf78de3a852bcc63.jpg

d78999602cb6282cac1526e564147b3e.jpg

41d36a14056ac831df1829f1241a9238.jpg

37fa1d9c085b343df47148539bbb3c88.jpg

Well with all the engine paint gone, but some little remnants, (I'm OK with the little thats left behind on it!) SO, I began by adding my resin B/RB big block valve covers to the kit stock heads. I then let that sit just long enough to set, and then began getting the position of the transmission ready, on the transmission. It also is one of my resin castings!!!! On Paps Ramcharger, it was an automatic, SO, the kits stock small block was replaced with this block seen here, as well as I used my 727 Torqueflite transmission to make it all come together. Looks pretty good! HOWEVER, I seen a few things detail-wise that caught my eye....
4d72ec3ae93a3ec861632a6452805358.jpg

See where the carburetor sits? IN front of that to the left you'll notice an orange-ish circle, NOT sure, but I think that was originally to be a radiator hose location! Where the thermostat would be! I had to fill it in, didn't like it, like that! SO, it got a little CA and some baking soda, and then hit with a Dremel, to make it flat with the surrounding surfaces!
THEN on the back of the intake, behind the carburetor location, there was ANOTHER make like that first one, NOT sure what that may have
been (possibly a rear mounted distributor?) I'm not sure, but again, either way, it had to disappear too! Filled in it, the same way I did the one in the front!
29a69514f0eb33d4e60a605cb8d3258c.jpg

Starter area where the transmission meets the block looks pretty good! So.... I left it as-is.
cb8fc97ec7c2e5a6ce88a77c03ed50a0.jpg

Back side of the block and transmission look pretty good, so moving right along.....
37fa1d9c085b343df47148539bbb3c88.jpg

I found me a trouble spot! The transmission didn't fit the block well on this side! NOT AT ALL, the transmission flange on the back of the block was WAY TO WIDE.... I had to file it down with the bolt lip of the transmission! It doesn't look bad at all now!
d78999602cb6282cac1526e564147b3e.jpg

I'm happy with the re-shaping of that bolt lip on the engine block, BUT, I noticed something was "missing" from the assembled engine! The damned fuel pump! It had to have come off during the stripping of the paint.... SO I poured my stripper through a nylon to remove paint particles from it, and catch any parts that may be in it......... Which when your done with any chemical type stripper whether brake fluid, or actual hobby stripper like I use, straining it out makes it last longer!!! And when I did this, Low & behold, there it was!
Nothing wrong with the fuel pump just came off probably during a time I was "brushing" some of the paint off..... All I have to do is glue it back on!
205235d30140034664ae6a1d36c2bced.jpg

Not to shabby! I glued the fuel pump back to where it belongs and then let it set to harden up before I was ready to add its first coat of Mopar Engine Blue..... It got that last night is now "standing" to let the blue dry.... Those pics will follow when I'm able to handle the freshly painted Mopar B 400!
ENJOY!
 
Well as I mentioned in my "verbal" update............ I needed to get the camera back in-hand to get some updated pics of what I accomplished.
Here ya go!
a89a3acad60d5e39b798489ee5264f84.jpg

Mopar "B" 400 painted with a NICE coat of Mopar Engine Blue. I also got the fuel pump painted silver as well!
4b390a79533ac300ab4952b8d195f9c0.jpg

Other side, to show a little "detail" paining that I did, the oil fill cap, painted gloss black, as per I believe it would have been on Pap's Ramcharger......... (He kept the engine, and the truck, as "stock" as he could) And from what I have heard on this, talkin' with my cousin, My Grandfather took some good pride in this truck as it was his one and only bought brand new vehicle!
More to come as I make progress! Thanks for looking! Som more details been pulled out of my parts bins, and will be ready to go in a couple hours worth of working on it! Starter is out, and both exhaust manifolds..... I have to slowly test fit everything to get it to fit as this engine is gonna require me to cut the frame cross-members up to fit it in properly..... As I was saying, nothing is ever a "drop in fit" real OR model!
Stay tuned!
 
So making a little more progress on the ole '79 Ramcharger....
I got the engine in Mopar Engine Blue, and then got to seeing what it take to make my resin casting of the 727 Torqueflite transmission work with the kits stock transmission mount.... (Had to measure up the transmission to the stock one, and then cut out of the resin transmission, where the mount would be, and then cut the mount off the kits stock transmission to put it onto my newly built 400 with 727 on it to mount to the kits frame, kinda following the kits assembly instructions to some extent to make this all happen and NOT have to change EVERYTHING in my wake!
b3bf9dc6af042a44478743507996935c.jpg

Transmission "tail" removed, as per the length of the white box stock kits transmission mount. Also seen in this picture!
THEN I did what was needed to fit the 2 parts together.... And added a "pin" between the 2 parts for strength, to hold it all together.
f0e83f877f2d2cb6ca83c4e9bc816d8f.jpg

55193b217ac475bf9db7889cba628c90.jpg

I don't think I done to bad getting this all to go together and look good all at the same time!
NOW however, fitting this motor into the frame, and getting it to fit within the inner fenders as well as the firewall and the core support! HOPEFULLY, it will (I "THINK" so, but we'll see) As you all know, change one part, and EVERYTHING around it changes, I'm trying to prevent this to some extent but..... We'll see! You guys know the drill on such things....
Stay tuned! More to follow right after these short messages!
 
OK more, from the engine fitting "bit" and all....... I mentioned it in my last posting, about the frame and how the engine fits (I'm NOT pleased with how Revell made the engine mount to the frame!) I can't STAND that they used a pin in the oil pan to mount to a cross-member in the frame (I literally HATE this type of engine mount!) Wasn't on the real cars and really would NEVER work to begin with, I know its a short cut but, I just can't "go" it... SO, fitting the newly made 400 B block, I had to see what choices I had for the engine mounting situation and not liking how Revell designed it to be. SO, off I went.....
327d93bf879d5929ec3eeb2b3d8c1514.jpg

This is the frame out of the box! I got the hole in the cross-member circled and some messages in the pic to show/explain what I found (in disgust) but you get the idea here.....
75ba741e86a12ce3356b4f3fcb060681.jpg

WELL trying to "fit" the engine in this box-stock kit frame wasn't gonna happen the oil pan isn't right for the way Revell made it to be (the oil pan on the original kits 318, was nothing like a small block LA Mopar engine anyway!) BUT this meant I had to cut that frame cross-member out, and fill the hole in it while it was removed from the frame. As I tried to fit the engine I found that the engine's oil pan would not "clear" the cross-member where it was box-stock, SO, I removed it, and plan to relocate it.
2469d4de70f9e7b48eece01c1ab5f3b2.jpg

With the engine and transmission all together with the transmission mount on, I "fitted" it to the frame with that cross-member removed to "mark" where the cross-member would have to be put back into the frame rails and then that set the stage for the actual engine mounts on either side of it. -Luckily, this NEW location, will just "clear" the stabilizer bar for the suspension! NOT by much, BUT it will clear it!
41d85b14647e187af9d837480e8db9d3.jpg

Cross-member back in place in its new location, relocated, slightly more forward. Some added wording to the picture to say what I had done!
70160eb141b77ef9c3384ee9770a9b86.jpg

8942075aac032bbd54d5a93b43952004.jpg

5716a7b47feda96f857a28388fe28fd9.jpg

A few more pictures showing the details of what I did do. When I cut the cross-member out, you have to remember that the blade you use to cut ANYTHING takes the thickness of the kerf out of that part, so in order to put it back in sort-of the same location, (if the spacing is the same) you have to add to it with something of the same materials, and just a bit more then the kerf of the blade. And then file or sand to the desired "fit" you wish to get.... Also using a good liquid solvent glue, will "melt" the plastic enough to squish into place (NOTHING real tight now), as you would almost have to distort the plastic at that point to get it to fit, but a little "weld bead" is PERFECT, that is just what I did here. The "plating" on either end of the cross-member will remain in place to look as tho it was end plated before being added to the frame. What fun this is gonna be, as I have now got to make somewhat realistic positioned "engine mounts" to meet up with the cast-on engine mounts on the engines block! That is going to follow! Stay tuned!!!!
Thanks for looking!
 
So as I said in the end of my last posting, I was getting ready to design and add in the new engine mounts to the frame.... Heres how it all started:
286b347deeffe5a5d095e324c3cd19b1.jpg

That straight part behind the cross-member, is merely a scrap piece of Evergreen Styrene "H" column I had laying on the bench in my little scrap pile, was just long enough for this too! WHY did I choose "H" and not "C"? I well didn't have any "C" channel as I may have used it, BUT, the "H" column works a bit better for such. And why you might ask? WELL, the "H" if you cut the top of the "H" off, just the "rails" of it, and have that web between it left over, act as that straight area that you see from removing just the rails off to the center web, that makes for a GREAT flat area to glue to the frame rails, and then the "notched out" vertical rails add in some other area for gluing.... this adds strength to the joint when glued! This "H" column gives you that "C" channel area, for a place to have the cast-in engine mounts in the block to rest in! -As you'll see!
775b14f549e3b4638c13e92efeda4949.jpg

Its made to fit as one long piece to keep it straight, BUT I found that this whole set up is going to need adjustment as I go, as the engine mounts on the engine itself, are not directly across from each other on the block! SO, those adjustments will be made as I go!
0f9dc7b377370bc9bf5c092a4cddd746.jpg

A bit difficult to see, but see the rails sticking up off the "H"? Those will be made to fit tight to the trucks frame rails and glued in place, when the time comes!!! -Glue joints like this add strength, not much but enough to hold something in place, thats just "placed" there, you know? I have to have at lest 3 contact locations for mounting the engine and transmission in, as well as the married transfer case!
So now the fun intense part of all this is ready to go.... You have to get a generalized location for the mounts, BOTH sides. mark them on the trucks frame rails! THEN figure out the height of them low on the trucks frame rails or high, and even "centered" sometimes it can be any of the 3 of these depending on the model and if your running it stock height, or lowering the its stance or even raising it like a 4x4 monster truck. A LOT comes into play here, just like a real car!
ANYWAY, I found that the best location for the engine was going to be low on the frame, and that made the engine mounts easy! My idea of the "H" column worked out perfectly then! And so, I went right into making them and doing whatever adjustments needed to be made as I went along.
bf606c91b18a199e264cf3c67485fd60.jpg

Made, positioned, and in place, WITH some added "angle" supports!!!! NOW the test is coming, HOW WELL do they fit, hold the engine, and are level side-to-side?
d05761b53a2323f12c31faad5635a299.jpg

Fits pretty good from this angle of pic.....
99c3f572c3fe7dfff278d5edc72c2f57.jpg

This angle of the engine looks good too! I checked it from side-to-side level and even that looked spot-on, I just could not get a good picture of this as it just would not snap a clear pic of this, because I think the frame is white and it blurred out the pic from the shine of it..... PITA no less tho!
Then as you seen I added some down bracing to the mounts, to hold a little weight, so why not add just a little front-to-back strength too much the same way? (I did after-all have the left overs from the first angle cuts), so why not use them too!? SO, I did.....
8652d157983204f966e3d446b9af06ba.jpg

d87f57e47fe6c42e2c69c1e24389e168.jpg

A little rough and misshapen right now, but once that glue is cured and I can, I plan to take a file across all these angles and joints just to clean them up a bit, and shape the angles a bit better!
Notice the "H" now" it looks as tho the H has a sort-of "cup" on the ends of the mounts for the engine mount "shoe" to fit right into! Making the engine fit solid, and snugly in-place!
This is it for now everyone thats following along, more to come in awhile.... I got a bit more done on the frame while I was working on the engine mounts, but, I am now headed to do some detail work on some parts of the Daisy Dukes Jeep while all this sets up and hardens solid so NOTHING moves when I'm working on it or handling it!
Enjoy for more! Thanks for looking!
 
OK guys, this frame has been looked over while I was building the new engine mounts.... Sadly, there is a few things, I'm simply NOT fond of, (A LOT of model cars companies mold things all "together" and thats one thing thats a pet-peeve of mine) BUT, I bet you all could have guessed that by now! Anyway, while looking over the frame, while the engine mounts were drying, I noticed one GREAT thing! The frame on this one isn't twisted in any way! NICE to have this once in awhile! LOL BUT the thing I noticed that well gets to me (just as much as the engine mount with the oil pan that I corrected, is the molded on, "Exhaust".... I can handle some parts of the exhaust molded onto the frame, such as muffler, or catalytic converter for strength of holding on the added on pipes and such. BUT molded on pipe, leaves SERIOUS parting lines on the pipes, and trimming it just doesn't give the pipe a look of "pipe".... SO, I normally use kit supplied parts, and bend my own pipe from Aluminum Floral Wire. PERFECT diameter for exhaust pipe!
So, heres what it started out like "box-Stock"....
25da78a1ea24da360d978d6ae2b44da0.jpg

As I put into the picture, this is "stock" right from the box (except for the NEW engine mounts!)
eec349333f9db84aa2e2ff217f5bce6f.jpg

See the cast in exhaust? I can't handle the muffler and how its done! They molded it into the frame, BUT left out the cross-member under it! (thats the type stuff that drives me crazy!) -And thats a short drive too! :p
So because of that cross-member not being "whole" thats the first place I started!
98280340fc7a01d79f6719ab359e2db4.jpg

The muffler was removed, first the pipe was cut, leaving some "extra" on the cat, and then the other end, cut closest to the frame, and then while the pipe were loose, I had to cut the muffler loose from the cross-member. This shows that "open" part of the cross-member that wasn't to my own liking!
At first, I was going to try and fill-in that missing part, and then I was like why? Thats A LOT of work for something like this, so I literally cut the whole cross-member out, and plan to replace it with something similar, and whole and only needing glued on each end, with no true fill, sanding or filing.... A lot LESS work!
bbf90eadafa83b7ecb464cd6e1e6cd10.jpg

74670c0226565b29f9308964ff7d7e36.jpg

b7a744d17a7b0ffd553fb1fbb8a95d80.jpg

Cut out the whole thing! THEN left the tail end on the frame, yet, and cleaned up the area off the cat so it looked half decent.
b7a744d17a7b0ffd553fb1fbb8a95d80.jpg

a8a3b78d58c61213c56b0414ed0d3e19.jpg

5c1ec062a1fce33c1e335aed802daabc.jpg

The new cross-member being made to replace the kit-part I removed! Will look GREAT once in place!!!!
f9eb27a08fa1e4e59ef71778ecae9d0d.jpg

In place! Looks GREAT as the original part that I removed, I rebuilt the new cross-member from plastic that was VERY CLOSE to what the stock part was! (Just "whole" from one frame rail to the other!!
dc96432d46d560554c2b67f302d89f68.jpg

99d86cea00dd5248fb312cc4f742a157.jpg

67a8bda34330970cc79e81b5405b7aef.jpg

1e0e1e1dbb1edfb363a583fbd5a9acfc.jpg

All cleaned up, cross-member in place, and the tail pipe removed!!!! I'll be making my own exhaust pipe from the cat back myself with that said Aluminum Floral Wire.... And my own hangers for it as well.... THEN from the cat forward, I'll be making that too to form a custom made "Y" pipe as Pap's Ramcharger had single exit exhaust.... Just like the stock one!
A little work YES BUT well worth it to me, as when its all done, will look GREAT so..... Thats what I like to see is what I fore-see during the build in the end result, and its coming along!
Stay tuned, there will be more to come! Thanks for looking!
 
So as all knows, I was workin'/concentrating on Daisy Dukes Jeep Resurrection a bit intensely, BUT in between times of the decals drying, I had to keep myself occupied with other small not so intense things.... SO, with working on the
CB set up in her Jeep, and allowing things there to dry, I looked at the 400 engine and all going into this build (it was in front of me during all this!) so.. I seen the oil filter, was just, fulla "fill" spots from the molding process, and with me, I turn my own filters from scarps of styrene I have laying around, so, I cut off the glue bomb part (original to the engine I used here) and left the mount but got rid of the round filter part, and simply replaced it with this:
35907c15fae858217d3a6bef47b2e8e9.jpg

Not to bad! It will be painted Testors standard Orange to look like a Fram filter..... from what my cousin told me thats all Pap used on this truck was Fram so... Fram it is! (May even get a Fram decal added to it too!)
While that was on there, I looked to see what I had for starters, too, this engine IF I recall right never had a starter on it, so HAD to find something to fit the engine and the build, and with that, its a Revell 440, that I made into a 400, SO this says that the starter from past Revell builds closely resembling this, the starter they include in their kits is sort of hollow. from looking up from underneath the car, it would show the "hole".... I took that into consideration while digging through my parts bin area of starters to get something close to the same.....
I did find one, and it was hollow so I went with it. I haven't got any pics of this, but it was "filled" in with CA and baking soda, to close up that hole from underneath, and filed to the contour of the starter itself. I also had to add a bit of thickness to the end of the starter were it will mount to the transmission bell housing as the transmission is NOT stock to this engine! SO, I had to make up the difference there as well!
I will try to get pics of this as it is difficult to get pics that are clear when the part is bright white! -SO, I didn't get good pics of this!
While waiting for things to dry, I also got a good second coat of my mixed "cast iron" steel color on the exhaust manifolds for this engine too!
Pics as soon as I can! Thanks for lookin'! Comments welcome!
 
Well back to this one a bit. As I'm sure you guys can see, I'm jumping back & forth between 2 models here! Daisy Dukes Jeep and this one! WELL Daisy's Jeep has to sit a bit for things to dry, and all without being "handled" in any way, SO, I thought, I'd hop right back to working on this one!
So, with my last "short" installment of updates on this, I literally just had the oil filter in-place, not painted or anything! (Yeah thats a short update!) SO, then, I got the oil filter painted, in orange to represent a "Fram" oil filter. I then sat out to see if I had ANY "Fram" decals to fit it. Which I did, once paint was dry, the filter label went right on!
01a2f98a4f814828d41457a02768f68c.jpg

dce404656f5df8d73da763cab7db8b5e.jpg

I sat it so that it wasn't turned straight up and down (to perfect of a placement!) BUT slightly off to the drivers side just a hair.... I don't do this often but, this looks pretty good!
I then let the decal set for a bit and then worked on the transmission paint as it had to be painted in-order to then put the newly painted starter on for detail of the engine!
Here is what the transmission looks like now:
59b117b2f303cf9d522c7af82d0f6ce0.jpg

I painted not only the transmission, but also the transfer case, as well as the Transmission mount. Seen here is just the transmission painted in my custom mix of "Cast-Iron" color....
f8b6ae283f28e59892110068b4d2bcd4.jpg

Mount on the transmission was left bare as it will be painted to match the frame! I also left the transmission pan, as well as the transfer case pan bare as they will be painted "steel" silver.... Testors Flat Steel #1180, as you see in a bit!
b6f111c647f697ce09151989c67e26ad.jpg

Starter in place, and the transmission painted as well as the transmission mount and the pans are both painted!
c9e370e9da794fca834338a9034c1d4e.jpg

6088bd06ec3e84a71f171067d34ad8e4.jpg

Thats as far as I got on the engine for now. More will follow, BUT I have some frame work that I've done coming up in just a few.... Stay Tuned! Comments welcome, ENJOY!!!!
 
So I got the transmission painted, as well as the pan on both it and the transfer case, and then sat it all aside to dry, and picked up the frame to this truck to see what else it needed. As you all know, I'm removing 95% of the cast on exhaust.... The 5% I left is the cat (in-place) as well as the sole Muffler, hat will be used and be a good "start" in either direction of the pipe I'll have to make fit this trucks frame! I WILL be using the stock muffler, BUT not "attached" by factory to the frame, I'll make it fit however the pipe when bent to fit turns out. SO then from the last pics and update I left you all with, the "Y" pipe was thee only part left of the factory exhaust system.... SO, I got to thinkin' The "Y" pipe making them from my aluminum floral wire, is difficult, its never an easy task, (I've done it several ways, several times!) SO this will be no exception, I was almost afraid to cut the factory one, off, BUT if I'm gonna do it, I may as well go bull bore into it.... SO, off that "Y" pipe came! THEN the cross-member right there was trimmed from what it was (molded into the pipe) Dremel to cut it out and make it uniform to the rest of the cross-member!
35d1db037ecf73dea6adab3649a1f32d.jpg

As you see, A LOT has been done to the frame too! I trimmed out that LARGE "skid-plate" to show some of the detail of the transfer case and transmission, BUT still look the part! (Protecting the area that is meant too!) I also removed the transmission mount bulge in the skid-plate too, I'm gonna slightly relocate it..... MORE into the mount cross-member, NOT in the skid plate!
d8bb10b22b4702b0b44ecb9ac79fbf41.jpg

d00242163dd78841da3d7eb6abe620b8.jpg

When I removed the sections of the skid-plate, I went back cleaned up those cuts and files the edge on an angle so I could put the "lip" back on the skid-plate! ALL the areas I cut off too, different size lips at that, I plan to drill them as well. For water drainage.
So to flip the frame over to see the up-side of it:
3e0ada25a771b0ad2cd55759d2570854.jpg

I took this pic to show the cat and the way I cut the hole in it for fit the pipe when the time comes! However this picture also shows the lips added to the skid-plate that I made too!
The frame is getting CLOSE to being ready for paint!!!! YAY!
e8ef2514595fb89b1c9b97e94dfad0a5.jpg

A bit more of the frame, right side up....
65d63749f0e2331d3df74356dc4f84ca.jpg

Better shot of the end of the cat and the hole I made for the pipe when its ready for exhaust to go in!
As with all my builds, the frame will be painted flat black, for the "undercoating" look, My grandfather did in fact have some local company undercoat it, when he got it home that year before winter.... This would have been sometime in the fall of 1979 from what my cousin told me on the phone, SO, I'll have to make this look the part as well (MOST if not ALL of my family has their vehicles undercoated for winter protection and to keep the underside as rust free as possible) He mentioned this as he hated being under it, to check things out, and all and when he did the power steering fitting the undercoating got pretty close to that too, as he told me it was hard to be under there, bump a small hose (brake line in the front drivers side) and get the undercoating to fall off the hose and in his eye..... LOL I laughed and was like, yep that sucks! Anyway, I'll be doing this to this truck too when the frame is ready for paint..... I'm a little ways away from that tho! BUT it is coming!
Anyway, thats it for this build for a little till more progress is made! Thanks for looking, comments welcome, ENJOY!
 
Back
Top